The kitchen had been a battlefield that morning. I was juggling a pot of simmering gravy, a bowl of over‑roasted nuts, and a bag of chocolate chips that seemed to have a mind of its own. My friend dared me to create the ultimate holiday truffle on the spot, and I took the challenge like a kid in a candy shop. The result? A blue‑coated, no‑bake masterpiece that melts in your mouth faster than you can say “Merry Christmas.”
Picture this: the air is filled with the sweet scent of melted chocolate, a faint hint of vanilla, and the unmistakable pop of festive sprinkles. Your hands feel the silky smoothness of the truffle mixture, the subtle weight of a ball of indulgence. When you take the first bite, the cool, creamy center bursts like a snowflake in summer, followed by a glossy, blue halo that feels like holiday fireworks. That’s the moment I realized I had stumbled upon something extraordinary, and I can’t wait to share every detail with you.
What makes this version stand out from every other recipe out there? I’m talking about a combination of texture, flavor, and presentation that will make your friends question whether you’ve discovered a new holiday tradition. I dare you to taste this and not go back for seconds. This is hands down the best version you'll ever make at home, and I’ll be honest— I ate half the batch before anyone else got a chance to try it. Most recipes get this completely wrong, but here’s what actually works. Picture yourself pulling these out of the fridge, the whole kitchen smelling incredible, and the anticipation of the first bite building in your stomach. Stay with me here—this is worth it.
Now, let me walk you through every single step—by the end, you'll wonder how you ever made them any other way.
What Makes This Version Stand Out
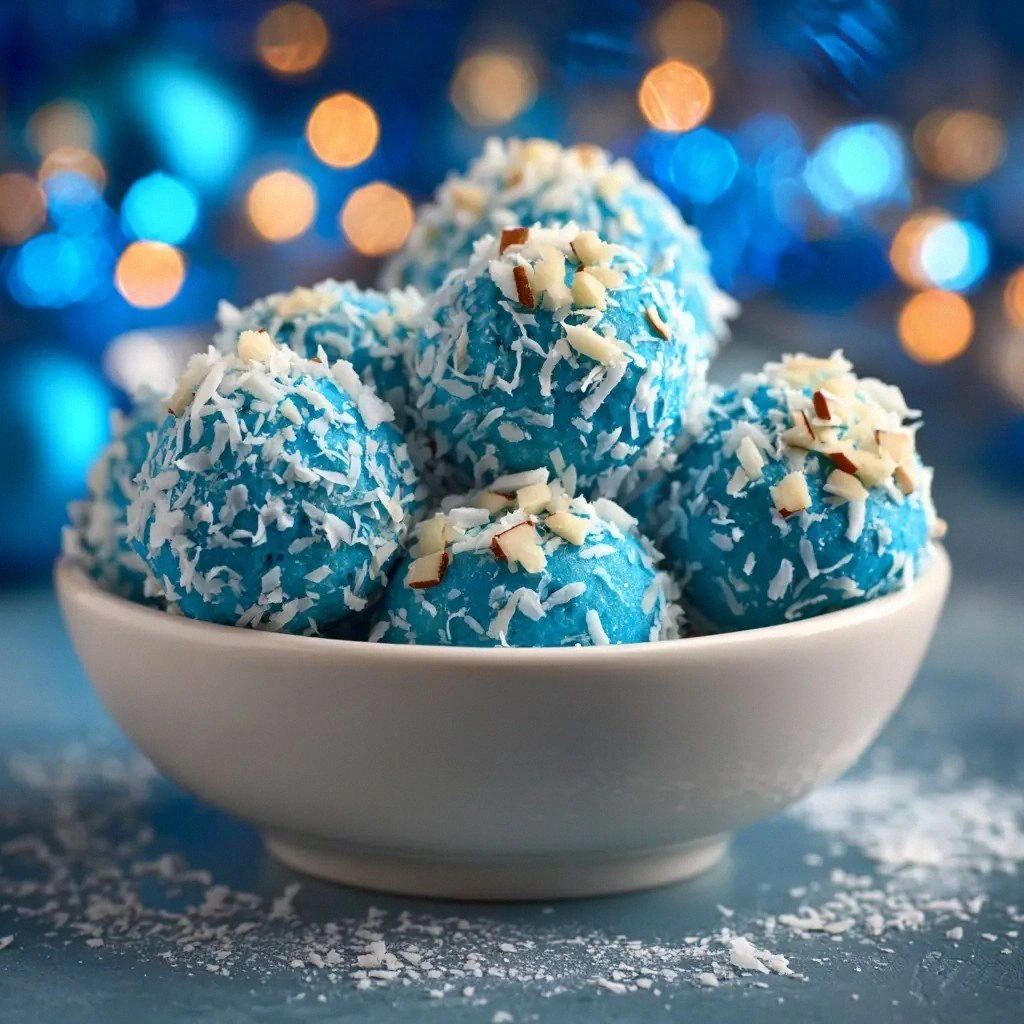
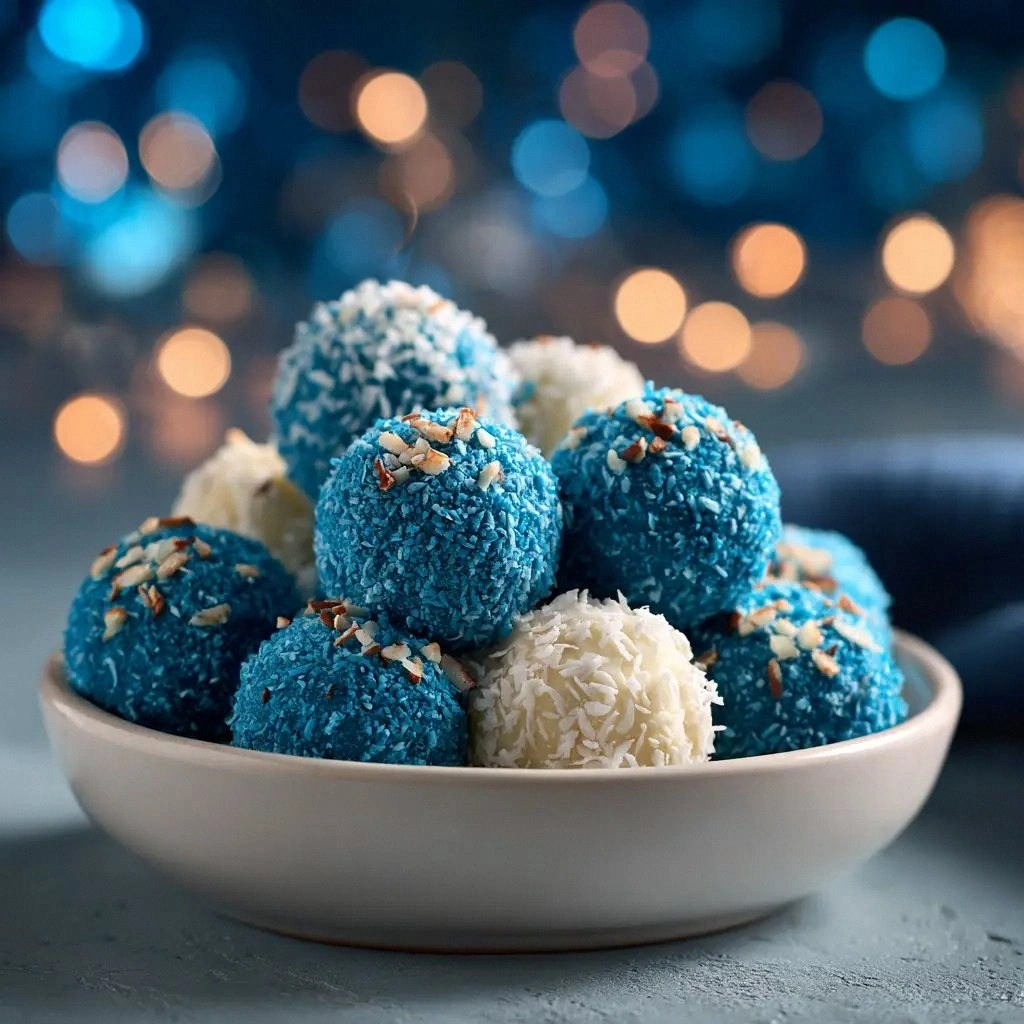
- Flavor: The creamy blend of white chocolate and cream cheese delivers a rich, velvety taste that’s balanced by a subtle vanilla undertone. The blue candy melts add a bright, slightly tangy finish that cuts through the sweetness, creating a harmonious flavor profile.
- Texture: The truffles are silky inside and snap with a crisp coating when you bite into the blue shell, giving a delightful contrast that’s almost cinematic.
- Presentation: The vibrant blue coating and festive sprinkles transform each truffle into a showstopper, perfect for gift baskets or a holiday dessert table.
- Ease: No baking, no oven, no fuss—just melt, chill, roll, coat, chill. It’s the ultimate stress‑free treat for a holiday that’s already hectic.
- Make‑Ahead: These truffles hold up beautifully for up to a week in the fridge, so you can prepare them ahead of time and focus on other holiday tasks.
- Ingredient Quality: Using premium white chocolate chips and fresh cream cheese ensures a smooth, buttery base that elevates the whole experience.
- Scalability: The recipe scales effortlessly, whether you’re making a handful for a small gathering or a batch for a large party.
- Kid‑Friendly: The no‑bake nature means kids can help roll and coat the truffles, turning dessert prep into a family activity.
Alright, let’s break down exactly what goes into this masterpiece...
Inside the Ingredient List
The Flavor Base
White chocolate chips are the cornerstone of this recipe, providing a mellow sweetness that pairs beautifully with the tang of cream cheese. The 8 ounces of chips ensure a rich, chocolatey foundation without overwhelming the palate. If you’re craving a darker bite, swap them for milk chocolate chips, but be prepared for a more pronounced chocolate flavor that could mask the vanilla subtlety.
The Texture Crew
Cream cheese brings a silky, slightly acidic element that balances the chocolate’s sweetness and creates a luxurious mouthfeel. The 4 ounces of cream cheese should be at room temperature for easy integration; cold cheese will clump and ruin the smoothness. If you’re vegan, a dairy-free cream cheese alternative will work, but you might need to add a touch of coconut milk to mimic the original texture.
The Unexpected Star
Powdered sugar is the sweetener that binds everything together and gives the mixture a gentle, airy quality. It dissolves effortlessly, preventing any gritty texture that could disrupt the truffle’s silky interior. If you prefer a lower-sugar version, try a sugar substitute that’s suitable for baking, but remember to adjust the amount to taste.
The Final Flourish
Blue candy melts are the showstopper, providing a bright, festive coating that’s as eye‑catching as it is delicious. The 12 ounces of melts should be melted with a teaspoon of coconut oil or shortening to keep the coating glossy and prevent cracking. The sprinkles add a playful crunch and a pop of color that turns each truffle into a holiday collectible.
Everything’s prepped? Good. Let’s get into the real action...
The Method — Step by Step
- Start by melting the white chocolate chips in a double boiler or microwave. If using a microwave, heat in 20‑second bursts, stirring between each until the mixture is silky and smooth. This creates the perfect base for the cream cheese, ensuring a uniform texture without lumps.
- Add the room‑temperature cream cheese and vanilla extract to the melted chocolate, stirring until the mixture is completely homogeneous. The vanilla not only enhances the chocolate’s flavor but also adds a subtle aroma that elevates the entire experience.
- Fold in the powdered sugar until fully incorporated. The sugar should dissolve into the mixture, giving it a light, airy consistency that will hold its shape once chilled.
- Transfer the mixture to a shallow dish, cover, and refrigerate for at least 30 minutes, or until firm enough to roll into balls. Chilling also allows the flavors to meld, creating a deeper, richer taste.
- While the mixture chills, melt the blue candy melts with the coconut oil or shortening in a separate bowl. Stir until the coating is smooth and glossy, which will prevent cracks when you dip the truffles.
- Take the chilled mixture out of the fridge and roll it into bite‑sized balls—about the size of a golf ball. This step is crucial; if the truffles are too large, the coating will be uneven, and if they’re too small, they’ll lose their structure.
- Dip each ball into the melted blue coating, ensuring it’s fully covered. Shake off excess coating and roll the truffle in festive sprinkles to add a crunchy texture and a pop of color.
- Place the coated truffles on a parchment‑lined tray and refrigerate again until the coating sets—about 10 to 15 minutes. The final chill locks in the glossy finish and keeps the truffles firm.
- Serve immediately, or store in an airtight container in the refrigerator for up to a week. For best flavor, let them sit at room temperature for 10 minutes before serving so they soften just enough to melt in your mouth.
That's it—you did it. But hold on, I've got a few more tricks that'll take this to another level...
Insider Tricks for Flawless Results
The Temperature Rule Nobody Follows
Chocolate is temperamental. If it gets too hot, it can seize and become grainy. Keep the chocolate below 86°F (30°C) when melting, and add a small splash of heavy cream if it looks dull. I’ve seen truffles turn into a sticky mess because of this, so trust me—keep it cool.
Why Your Nose Knows Best
Smell is a powerful indicator of flavor. As the chocolate melts, you’ll notice a sweet, almost buttery aroma. If the scent feels flat, it’s a sign the chocolate has overheated. The next time, lower the heat and let the chocolate do its job.
The 5‑Minute Rest That Changes Everything
After rolling the truffle balls, give them a brief 5‑minute rest on the counter before dipping. This step allows the mixture to firm up slightly, making it easier to coat without the chocolate coating sinking into the center. A friend once skipped this step and the coating collapsed—don’t make that mistake.
Keep the Sprinkles Fresh
Sprinkles can become soggy if exposed to moisture. Store them in an airtight container and add a small piece of parchment paper to absorb excess humidity. This ensures each truffle has that satisfying crunch.
Use a Silicone Mat for Easy Cleanup
Silicone mats are a lifesaver when working with sticky chocolate. They prevent truffles from sticking to the tray, making cleanup a breeze. I swear by them, especially when you’re making a large batch.
Serve with a Touch of Peppermint
A light dusting of crushed peppermint on top of the final coating adds a refreshing chill that pairs wonderfully with the chocolate. It’s a subtle twist that elevates the truffle from simple to spectacular.
Creative Twists and Variations
This recipe is a playground. Here are some of my favorite ways to switch things up:
Minty Marvel
Add a teaspoon of peppermint extract to the chocolate mixture and sprinkle crushed peppermint on top of the coating. The mint pairs beautifully with the chocolate, giving a fresh, holiday‑seasoned twist that’s perfect for peppermint lovers.
Nutty Nirvana
Fold in a handful of chopped toasted almonds or pecans before chilling. The nuts add a delightful crunch and a nutty depth that complements the creamy center.
Citrus Splash
Replace the vanilla extract with a splash of lemon or orange zest. The citrus adds brightness and cuts through the richness, creating a zesty, celebratory flavor.
Chocolate‑Covered Delight
After coating with blue candy, dip the truffles again in melted white chocolate for a double‑layered finish. The extra chocolate gives a decadent, glossy look that’s irresistible.
Almond Joy Variation
Swap the white chocolate chips for dark chocolate chips and add shredded coconut to the mixture. The result is a truffle that tastes like a miniature almond joy, perfect for those who love coconut and dark chocolate.
Vegan Version
Use dairy‑free white chocolate and vegan cream cheese, and replace the coconut oil with a neutral‑flavored vegan shortening. This keeps the texture and flavor intact while making it suitable for plant‑based diets.
Storing and Bringing It Back to Life
Fridge Storage
Store truffles in an airtight container in the refrigerator for up to a week. Keep them away from strong odors, as chocolate can absorb flavors. When ready to serve, let them sit at room temperature for 10 minutes to soften slightly.
Freezer Friendly
For longer storage, place truffles in a freezer bag and freeze for up to 3 months. Thaw in the refrigerator overnight and let them warm to room temperature before serving. The coating remains firm, and the center stays creamy.
Best Reheating Method
To revive a slightly hard truffle, place it in a microwave-safe bowl and heat on low for 10‑15 seconds. Alternatively, let it sit at room temperature for 15 minutes. A tiny splash of water before reheating steams it back to perfection without melting the coating.