It started with a burnt batch of cookies, a kitchen that smelled like disappointment, and a friend who dared me to make the ultimate ice‑cream sandwich. I was armed with a recipe from a cooking show that promised “the best version you'll ever make at home,” but the result was a flat, soggy mess that tasted like cardboard. I laughed, I cried, and I vowed to turn that disaster into a triumph. Now, after countless trials, I’ve cracked the secret that transforms ordinary cookie dough into buttery, golden bites that hold a scoop of ice‑cream like a warm hug. This is not just a cookie; it’s a crunchy, creamy, hand‑made hug that will make you question why you ever settled for store‑bought.
Picture the kitchen: the counter is a battlefield of flour clouds, the oven preheating to a steady 350 °F, and the air thick with the scent of vanilla and toasted sugar. The sound of the cookie dough being rolled out is a rhythmic drumbeat, while the faint hiss of butter melting on the stovetop adds a soothing background. When the first cookie hits the pan, the sizzle is a promise of crisp edges that shatter like thin ice, releasing a caramelized aroma that makes your mouth water. The texture is a delicate balance—soft inside, crisp outside—and the flavor is a buttery caramel that lingers long after the bite. Every component sings together in a symphony that feels both nostalgic and brand new.
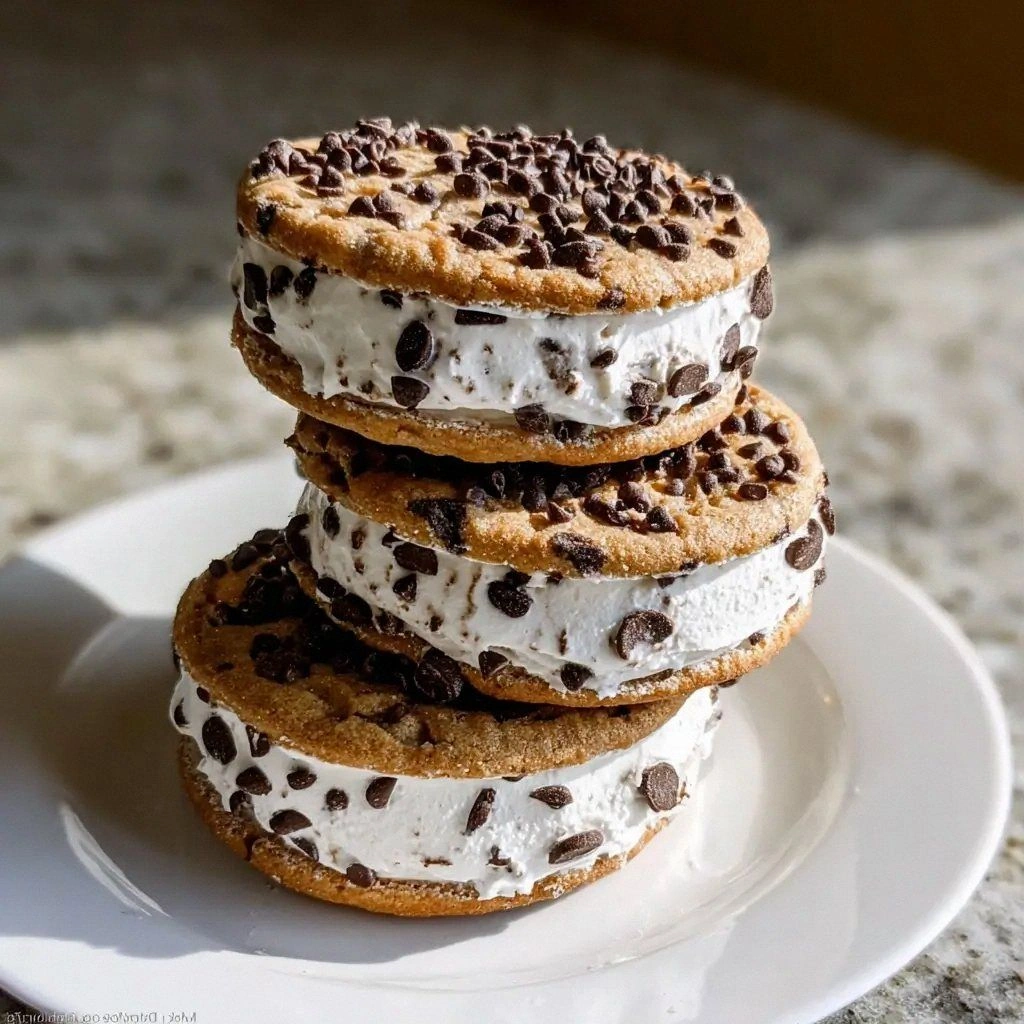
What sets this version apart is the meticulous layering of flavors and textures. I’ve tweaked the classic cookie recipe by adding a splash of espresso powder to deepen the chocolate notes, and I’ve used a blend of high‑quality butter and ghee to give the cookies a rich, nutty finish. The ice‑cream is not just any vanilla; it’s a homemade churned vanilla with a hint of Madagascar vanilla bean, giving it a silky, almost buttery mouthfeel. The sandwich technique—pressing the cookies together with a thin layer of the ice‑cream—creates a melt‑in‑your‑mouth experience that feels like a secret indulgence. The result? A cookie that’s crunchy, chewy, and perfectly balanced with a creamy center that never feels cloying.
I dare you to taste this and not go back for seconds. I’ve spent weeks experimenting with ratios, and the final formula is a sweet‑savory dance that’s hard to resist. If you’ve ever struggled with cookies that fall flat or ice‑cream that melts too fast, you’re not alone—and I’ve got the fix. The trick is in the timing and the precise temperature control, which I’ll walk you through step by step. The best part? You can make these at home, and they’ll taste as good as any dessert shop, if not better.
Most recipes get this completely wrong. Here’s what actually works: the cookie dough must rest for at least an hour before baking, and the ice‑cream should be slightly softened so it can spread without melting the cookies. The sandwich is assembled at room temperature, allowing the cookies to hold their shape. The final touch is a quick glaze of melted chocolate or a dusting of powdered sugar that adds a glossy finish. Picture yourself pulling this out of the oven, the whole kitchen smelling incredible, and the anticipation of that first bite building up like a crescendo.
If you’re ready for a game‑changer, keep reading. I’ll show you how to transform a simple cookie recipe into a dessert that feels like a luxury treat, but with the comfort of homemade goodness. And trust me, the next part? Pure magic. Stay with me here—this is worth it. By the end, you’ll wonder how you ever made it any other way.
What Makes This Version Stand Out
- Flavor: The subtle espresso infusion elevates the chocolate chips, giving each bite a depth that lingers on the palate.
- Texture: The cookies achieve a perfect contrast—crisp edges, chewy centers, and a buttery crumb that melts in your mouth.
- Ingredient Quality: Using premium butter and Madagascar vanilla bean ice‑cream ensures a rich, silky finish.
- Ease of Assembly: The sandwich technique is simple, yet the result feels indulgent, making it ideal for both beginners and seasoned bakers.
- Make‑Ahead Potential: Cookies can be baked in advance and stored in an airtight container, while the ice‑cream can be kept frozen until assembly.
- Crowd Reaction: Friends rave about the melt‑in‑your‑mouth experience, and it’s a hit at parties and family gatherings.
- Visual Appeal: The glossy glaze and dusting of powdered sugar give the finished product a professional, Instagram‑ready look.
- Versatility: Swap chocolate chips for white chocolate or add nuts for an extra crunch—this base adapts to any craving.
Alright, let's break down exactly what goes into this masterpiece…
Inside the Ingredient List
The Flavor Base
All‑purpose flour is the backbone of the cookie, providing structure without overpowering the buttery notes. Use 2 cups, sifted to eliminate lumps, ensuring a light, airy crumb. If you prefer a slightly denser cookie, substitute half of the flour with whole‑wheat flour for added fiber and nuttiness.
Granulated sugar brings crispness and a clean sweetness that balances the chocolate chips. Measure 1 cup carefully; too much sugar can cause the cookies to spread too far, while too little will leave them bland. Brown sugar, another cup, adds moisture and a subtle molasses undertone that deepens the flavor profile.
The Texture Crew
Unsalted butter, softened to room temperature, is essential for that buttery, melt‑in‑your‑mouth texture. Use 1 cup (2 sticks) for maximum flavor. If you’re in a hurry, a quick melt in a microwave or double boiler works, but ensure it’s not too hot to avoid cooking the butter.
Baking soda (1 teaspoon) is the leavening agent that gives the cookies a slight lift. It reacts with the acidic vanilla extract, creating tiny bubbles that make the cookies airy. Be precise; too much soda can give a metallic taste.
Salt (1 teaspoon) is the flavor enhancer that brings out the richness of the butter and chocolate. It also balances the sweetness, preventing the cookies from feeling cloying. Use a fine sea salt for a subtle crunch.
The Unexpected Star
Espresso powder (1 teaspoon) is the secret ingredient that amplifies the chocolate flavor without adding a bitter coffee taste. It dissolves completely into the dough, giving a subtle depth that feels like a chocolate‑espresso truffle. If you’re vegan, use instant coffee grounds instead.
Vanilla extract (2 teaspoons) is the aromatic backbone of the cookie dough. Opt for pure vanilla extract for a richer flavor. A hint of vanilla bean paste adds an extra layer of complexity, especially if you’re aiming for a gourmet touch.
The Final Flourish
Chocolate chips (1 cup) are the star of the show. Choose high‑quality semi‑sweet chips for a balanced sweetness. For a twist, mix in a handful of dark chocolate chunks for a slightly bitter bite.
Ice‑cream (2 cups, slightly softened vanilla) is the heart of the sandwich. Homemade vanilla ice‑cream with a hint of Madagascar vanilla bean gives a silky mouthfeel that contrasts beautifully with the crunchy cookie. If you’re short on time, use a premium store‑bought vanilla that’s been softened for 5 minutes.
Everything's prepped? Good. Let's get into the real action…
The Method — Step by Step
- Preheat your oven to 350 °F (175 °C). Line a baking sheet with parchment paper to prevent sticking. This step ensures even heat distribution and a clean release. The oven should be fully preheated before you start baking.
- In a large bowl, cream together softened butter, granulated sugar, and brown sugar until light and fluffy. Use an electric mixer on medium speed for 3–4 minutes. The mixture should be pale and airy, indicating the sugars have fully incorporated. This creates the base for a tender crumb.
- Add vanilla extract, espresso powder, and salt to the creamed mixture. Stir until just combined. The aroma should fill the kitchen, hinting at the depth to come. Be careful not to overmix, or the dough may become too dense.
- Whisk the flour and baking soda together in a separate bowl. Gradually fold the dry ingredients into the wet mixture until just combined. The dough should be thick but pliable. A few streaks of flour are acceptable; do not overwork.
- Fold in the chocolate chips, ensuring even distribution. This step is crucial for that satisfying chocolate bite in every bite. The chips should be fully coated by the dough to avoid sinking.
- Place a tablespoon of dough onto the prepared baking sheet. Use a cookie scoop or spoon to shape it into a round, slightly flattened disk. Space the cookies 2 inches apart to allow for spreading. The shape will influence the final texture.
- Bake for 10–12 minutes, or until the edges are golden and the centers look set but still slightly soft. The cookies should lift off the parchment when gently lifted. This timing is critical; underbaked cookies will be chewy, overbaked will be brittle.
- Remove from oven and let cool on the sheet for 5 minutes before transferring to a wire rack. This brief cooling period allows the cookies to firm up and prevents them from breaking. The aroma at this stage is irresistible.
That’s it — you did it. But hold on, I've got a few more tricks that'll take this to another level. The next step? Assemble the sandwiches while the cookies are still warm. This ensures the ice‑cream spreads just enough to bind the cookies without melting them.
Insider Tricks for Flawless Results
The Temperature Rule Nobody Follows
Keep your oven at a steady 350 °F. Fluctuations can cause the cookies to bake unevenly, resulting in soft centers and hard edges. Use an oven thermometer to monitor the true temperature, especially if your oven tends to run hot. This simple check saves you from a batch of disappointment.
Why Your Nose Knows Best
The aroma is a reliable indicator of doneness. When the cookies smell nutty and caramelized, they’re ready to come out. If the scent is overly sweet or raw, they need a few more minutes. Trust your nose; it’s the most accurate gauge.
The 5‑Minute Rest That Changes Everything
After baking, let the cookies rest on the sheet for 5 minutes before transferring them. This short rest allows the structure to set, making them easier to handle. Skipping this step can lead to fragile cookies that crumble when you try to assemble the sandwich.
Glaze for a Luxe Finish
A quick drizzle of melted dark chocolate or a dusting of powdered sugar adds a glossy, professional look. The glaze also seals the cookie surface, preventing the ice‑cream from seeping in. For an extra pop of flavor, sprinkle a pinch of sea salt on top before the glaze sets.
The Secret to a Smooth Sandwich
Let the ice‑cream soften for just 2–3 minutes at room temperature. This makes it spreadable but still firm enough to hold the cookies together. If the ice‑cream is too soft, it will melt the cookie edges; too firm, and it won’t bond.
Creative Twists and Variations
This recipe is a playground. Here are some of my favorite ways to switch things up: swap the chocolate chips for white chocolate or add a handful of toasted pecans for a nutty crunch. For a tropical vibe, fold in shredded coconut or drizzle a bit of coconut milk on the cookies before baking. If you’re a spice lover, add a pinch of cayenne pepper or chili flakes to the dough for a subtle kick that pairs wonderfully with the creamy center.
Nutty Bliss
Replace the chocolate chips with a mix of chopped almonds and hazelnuts. The nuts add a satisfying crunch and a buttery flavor that complements the vanilla ice‑cream. Toast the nuts first for an extra depth of flavor.
Minty Fresh
Add a teaspoon of peppermint extract to the dough and use mint‑flavored ice‑cream. The result is a cool, refreshing sandwich that’s perfect for hot afternoons. A dusting of crushed peppermint candies on top adds a festive touch.
Caramel Crunch
Swirl a caramel sauce into the dough before baking. The caramel melts into pockets of gooey sweetness that contrast with the crunch. Pair this with a caramel‑flavored ice‑cream for a double caramel delight.
Spiced Espresso
Increase the espresso powder to 2 teaspoons and add a pinch of cinnamon. The espresso’s boldness is amplified, while the cinnamon adds warmth. This version is ideal for late‑night cravings.
Berry Surprise
Fold in fresh blueberries or raspberries into the dough. The berries burst with juice, creating a fruity center that pairs wonderfully with a berry‑flavored ice‑cream. The contrast of sweet and tart is a crowd‑pleaser.
Storing and Bringing It Back to Life
Fridge Storage
Store the assembled sandwiches in an airtight container at room temperature for up to 3 days. The cookies will stay crisp, and the ice‑cream will soften slightly, giving a creamy consistency. Keep the container away from direct sunlight to prevent melting.
Freezer Friendly
Wrap each sandwich individually in plastic wrap and place them in a freezer bag. They’ll keep for up to 2 weeks. When ready to eat, let them thaw at room temperature for 15 minutes before serving.
Best Reheating Method
To revive the crunch, place the sandwich on a baking sheet and bake at 350 °F for 3–4 minutes. This short bake restores the cookies’ crispness without melting the ice‑cream. If the ice‑cream is too soft, add a splash of milk before reheating to keep it from melting.