It started on a rainy Tuesday when I stared at a pot of burnt sugar on the stove, feeling the sting of disappointment like a hot pepper on my tongue. I was craving something sweet, creamy, and utterly comforting, yet the kitchen was a battlefield of charred caramel and a lingering hint of burnt vanilla. The moment the smoke alarm chirped, I made a promise to myself: I would find a way to turn that disaster into a silky, luscious dessert that would make my taste buds dance. And that promise turned into an obsession, a mission that would lead me to the ultimate vegan dulce de leche.
Picture this: a golden, cloud‑like sauce that drizzles over pancakes, swirls into ice cream, or simply sits in a glass, inviting you to dip a spoon and surrender to its buttery richness. The aroma alone—warm coconut, sweet brown sugar, and a whisper of sea salt—can make any kitchen feel like a cozy bakery on a winter morning. I swear, the first time I tasted it, my eyes widened, and I felt as if I’d just discovered a secret that the world had been hiding. That moment was the spark that ignited my passion for this recipe, and I couldn’t wait to share every detail, every tweak, every little trick that makes it unforgettable.
Why is this version so special? Because it takes the classic dulce de leche and elevates it into a vegan, dairy‑free masterpiece that still delivers the same velvety texture and caramel depth you’d expect from the traditional version. I’ve stripped away the need for a double boiler, a slow simmer for hours, or any fancy equipment. Instead, I’ve harnessed the power of coconut cream and milk, two ingredients that bring their own tropical sweetness and lusciousness, while a simple stovetop method brings the whole batch together in under twenty minutes. The result? A silky sauce that coats your spoon like velvet, a texture that melts in your mouth, and a flavor profile that’s both comforting and surprisingly sophisticated.
And there’s a twist that sets this apart: a single pinch of salt that unlocks the sweetness, a subtle balance that turns a simple sauce into a flavor bomb. I dare you to taste this and not go back for seconds. If you’re skeptical, let me walk you through each step. By the end, you’ll wonder how you ever made it any other way.
What Makes This Version Stand Out
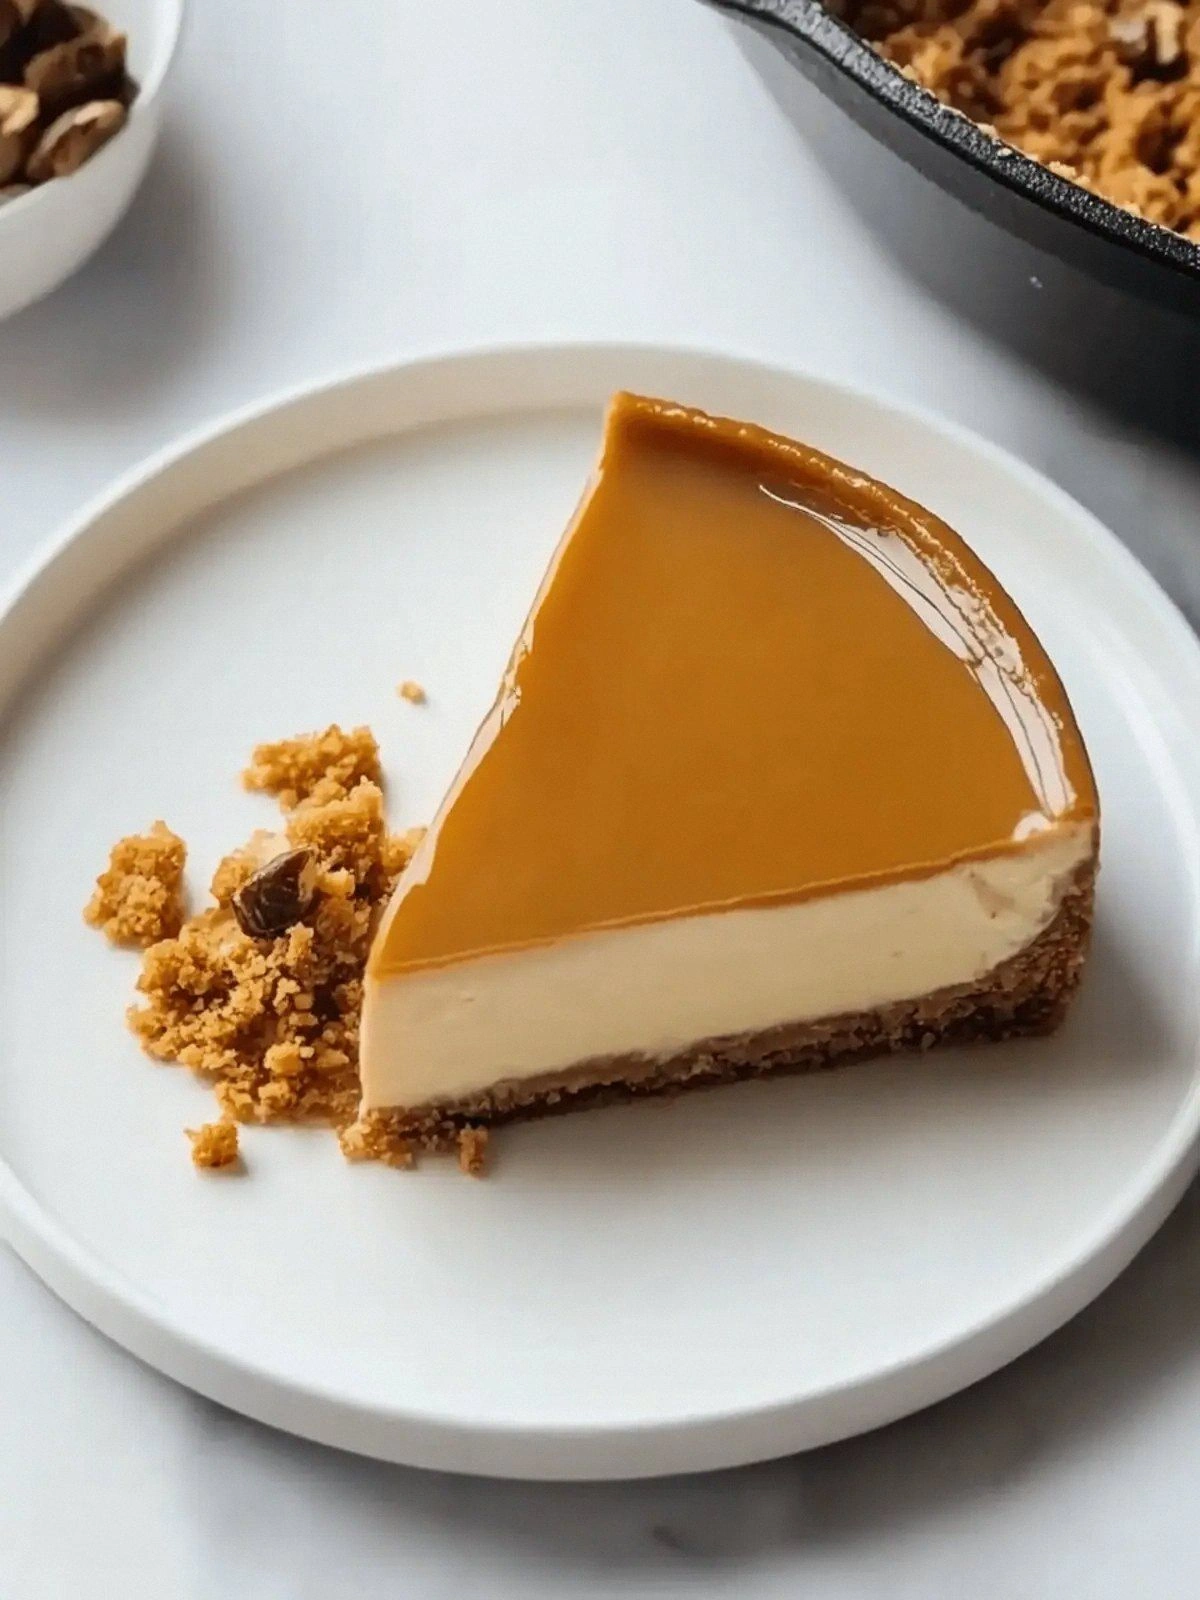
- Texture: The sauce achieves a silky, custard‑like consistency without the need for whisking or a double boiler, thanks to the natural creaminess of coconut products.
- Flavor: A single pinch of salt amplifies the caramel notes, creating a depth that feels both sweet and savory.
- Speed: From prep to finish, the entire process takes less than thirty minutes, a fraction of the time traditional dulce de leche requires.
- Versatility: It can be poured over pancakes, stirred into oatmeal, or served as a dip for fresh fruit—every use feels indulgent.
- All‑Vegan: No dairy, no eggs, no animal products—just plant‑based ingredients that still deliver on richness.
- Make‑ahead: The sauce thickens as it cools, making it perfect for preparing in advance and storing for later.
- Ingredient Quality: Using high‑quality coconut cream and milk ensures a smooth, buttery base that doesn’t break or separate.
- Minimal Equipment: A single saucepan and a wooden spoon are all you need; no fancy gadgets required.
Alright, let’s break down exactly what goes into this masterpiece…
Inside the Ingredient List
The Flavor Base
Light brown sugar is the star that brings caramel depth to the sauce. Its molasses content gives the final product a subtle complexity that plain white sugar can’t match. When it dissolves in coconut cream, it creates a sweet, almost buttery undertone that feels indulgent. Skipping sugar would leave the sauce bland, so keep the 1.5 cups exactly as called for.
Salt is the secret weapon that unlocks sweetness. A half teaspoon of sea salt balances the sugar, preventing the sauce from feeling cloying. It also enhances the coconut’s natural flavor, making each spoonful a harmonious blend of sweet and savory. If you prefer a slightly sweeter profile, reduce the salt to a pinch, but expect a less complex finish.
The Texture Crew
Coconut cream is the thick, rich component that gives the sauce its luxurious mouthfeel. The 14-ounce can delivers a dense, buttery consistency that coats the spoon like velvet. Because coconut cream is naturally high in fat, it prevents the sauce from separating during the cooking process. If you can’t find a full‑fat version, look for a 12-ounce can; the texture will still be excellent, though slightly less indulgent.
Coconut milk is the liquid that balances the cream and allows the sauce to simmer smoothly. The 14-ounce can provides a creamy base that blends seamlessly with the cream. It also adds a subtle coconut aroma that enhances the overall flavor. If you’re looking for a lighter version, use a 12-ounce can or a low‑fat coconut milk; the sauce will be thinner but still delicious.
The Unexpected Star
While the recipe looks simple, the combination of coconut cream and milk is the unexpected star. Coconut’s natural sweetness complements the brown sugar, creating a harmony that feels both tropical and comforting. This pairing also makes the sauce naturally vegan and dairy‑free, broadening its appeal to a wider audience. Without coconut, the sauce would lack the unique depth that makes it stand out.
The Final Flourish
The final flourish is the cooking technique—low heat, constant stirring, and a gentle simmer. This method ensures the sugar dissolves completely, preventing crystallization and creating a smooth finish. The sauce should thicken gradually, taking on a glossy sheen that signals readiness. If you rush the process or use high heat, the sauce can scorch or separate, ruining the silky texture.
Everything’s prepped? Good. Let’s get into the real action…
The Method — Step by Step
- Step 1: Gather Your Ingredients. Lay out the coconut cream, coconut milk, brown sugar, and salt. The ingredients should be at room temperature for a smoother blend. This step is crucial—any temperature difference can affect the sauce’s consistency. Feel free to give the can a gentle shake before opening to mix the cream and milk.
- Step 2: Combine Coconut Cream and Milk. In a medium saucepan, pour the entire 14-ounce can of coconut cream and 14-ounce can of coconut milk. Use a whisk to blend them together until the mixture is uniform. The creamy base should look slightly opaque and glossy. This mixture sets the stage for the caramelization that follows.
- Step 3: Add Brown Sugar. Sprinkle the 1.5 cups of light brown sugar over the coconut mixture. Stir vigorously until the sugar dissolves completely. The sugar should sink and then rise as it melts, forming a swirling pattern. This is the moment when the sauce begins to take on its caramel hue. If you notice any undissolved grains, keep stirring until they vanish.
- Step 4: Season with Salt. Add 0.5 teaspoon of sea salt. The salt should dissolve immediately, creating a subtle sparkle on the surface. The flavor balance is now set—sweetness, richness, and a hint of savory. This step is often overlooked but is essential for depth.
- Step 5: Simmer on Low Heat. Reduce the heat to low, allowing the mixture to bubble gently. Let it simmer for about 15 to 18 minutes, stirring every few minutes. Watch for the sauce to thicken and develop a deep amber color. The aroma should be sweet and nutty, reminiscent of toasted coconut. If the sauce starts to scorch, lower the heat further or remove the pot from the burner for a moment.
- Step 6: Check for Consistency. To test the sauce’s thickness, dip a spoon into the mixture and let it run off. The sauce should coat the spoon and form a ribbon that takes a few seconds to dry. If it’s still too runny, continue simmering for an additional 2 to 3 minutes. The sauce will thicken as it cools, so a slightly thinner consistency now is fine.
- Step 7: Remove from Heat. Once the sauce reaches the desired thickness, turn off the heat. Let it rest in the pot for a minute to allow the flavors to meld. This resting period also helps the sauce to settle, reducing the risk of separation. The sauce should look glossy and silky.
- Step 8: Transfer and Cool. Transfer the sauce to a heat‑resistant glass jar or bowl. Allow it to cool to room temperature before sealing. As it cools, the sauce will thicken further, creating a luscious, pourable consistency. If you’re using it immediately, you can drizzle it straight from the pot.
- Step 9: Store or Serve. Store the cooled sauce in the refrigerator for up to a week. If you’re serving it immediately, pour it over pancakes, waffles, or fresh fruit. The sauce’s silky texture will melt into your dessert like a warm, sweet blanket. Enjoy the moment when the first spoonful hits your tongue—pure bliss.
That’s it — you did it. But hold on, I’ve got a few more tricks that will take this to another level…
Insider Tricks for Flawless Results
The Temperature Rule Nobody Follows
Many people think any heat will do, but the sauce’s texture hinges on maintaining a low, steady temperature. A thermometer is handy—aim for 160°F to 170°F. This range ensures the sugar melts without scorching, producing a smooth, caramelized finish. If you lack a thermometer, look for the “small bubbles” stage; the sauce should bubble gently, not violently.
Why Your Nose Knows Best
Smell is a powerful indicator of doneness. When the sauce is ready, the aroma will shift from raw sugar to warm, toasted coconut. Your nose can tell you when the sauce has achieved the right depth, even if the visual cues are subtle. Trust your senses; they’re the best judge of quality.
The 5-Minute Rest That Changes Everything
After you remove the pot from the heat, let the sauce sit for five minutes before transferring it. This rest allows the sugar crystals to dissolve fully, eliminating any gritty texture. It also lets the flavors meld, creating a richer, more cohesive taste. Skipping this step can leave the sauce feeling unfinished.
Stirring Technique for a Smooth Finish
Stir with a wooden spoon, not a metal whisk, to avoid metallic taste. Stir in a circular motion, always moving the spoon from the center to the edges. This technique helps distribute heat evenly and prevents the sauce from sticking to the bottom. The result is a glossy, silky finish that’s impossible to replicate with a quick stir.
Choosing the Right Coconut Brand
Not all coconut milk or cream is created equal. Look for brands that use only coconut and water, with no added sugars or thickeners. A higher fat content yields a richer sauce. If you’re on a budget, the store brand often works fine, but premium brands like Nutiva or Native Forest provide a smoother, more buttery texture.
Keeping the Sauce from Separating
When the sauce cools, it can separate into a watery layer on top. To avoid this, whisk the sauce once more before refrigerating. This re‑emulsifies the fats and sugars, keeping the sauce uniform. If separation occurs, add a splash of coconut milk and whisk vigorously to bring it back together.
Creative Twists and Variations
This recipe is a playground. Here are some of my favorite ways to switch things up:
Chocolate Drizzle
Swirl in a tablespoon of melted dark chocolate during the final stir. The chocolate adds a rich, bittersweet undertone that pairs beautifully with the coconut sweetness. Serve over vegan chocolate cake for a decadent dessert.
Spiced Coconut
Add a pinch of ground cinnamon or a dash of nutmeg to the simmering sauce. The spices bring warmth and complexity, turning the sauce into a holiday treat. Sprinkle the spiced version over oatmeal for a cozy breakfast.
Maple Infusion
Replace half the brown sugar with pure maple syrup. The syrup introduces a subtle maple flavor that complements the coconut base. This version is perfect for brunch, drizzled over pancakes or French toast.
Almond Butter Swirl
Stir in a tablespoon of almond butter during the last minute of cooking. The nutty flavor adds depth and a slight thickness to the sauce. This variation works great with vegan protein pancakes.
Salted Caramel
Increase the salt to one teaspoon and add a pinch of smoked sea salt. The caramel becomes richer, with a hint of smokiness that’s surprisingly delicious. Pair it with a scoop of coconut ice cream for a dessert that’s both sweet and savory.
Berry Burst
Fold in fresh berries after the sauce has cooled. The berries add juiciness and a burst of tartness that balances the sweetness. This makes a refreshing dessert parfait when layered with coconut yogurt.
Storing and Bringing It Back to Life
Fridge Storage
Store the cooled sauce in an airtight container in the refrigerator for up to one week. The sauce will thicken as it cools, so you may need to stir or whisk it before using. The texture remains silky, and the flavor deepens with each day.
Freezer Friendly
For longer storage, freeze the sauce in a freezer‑safe container for up to two months. Thaw overnight in the refrigerator before using. If the sauce separates during freezing, whisk it again before serving to re‑emulsify.
Best Reheating Method
Reheat gently on the stove over low heat, stirring constantly. Add a splash of coconut milk to loosen the consistency and prevent scorching. The sauce should return to a silky, pourable state, ready to drape over your favorite treats.