It started with a kitchen disaster that felt like a bad dream: I was attempting to make a classic cheesecake, only to realize the oven had been set to bake at a scorching 350 °F while the batter was still in the fridge. I stared at the timer, the clock ticking like a metronome, and thought, “Why not make something that won’t burn me?” That moment of panic turned into a revelation—no-bake mini cheesecakes could be the answer to my culinary chaos. The idea was simple: a creamy filling, a crunchy base, and a touch of vanilla, all assembled without an oven. I was already craving something sweet, so I dove into the pantry and found a box of vanilla wafers, a tub of cream cheese, and a jar of powdered sugar. The combination of these humble ingredients felt like a secret handshake among dessert lovers.
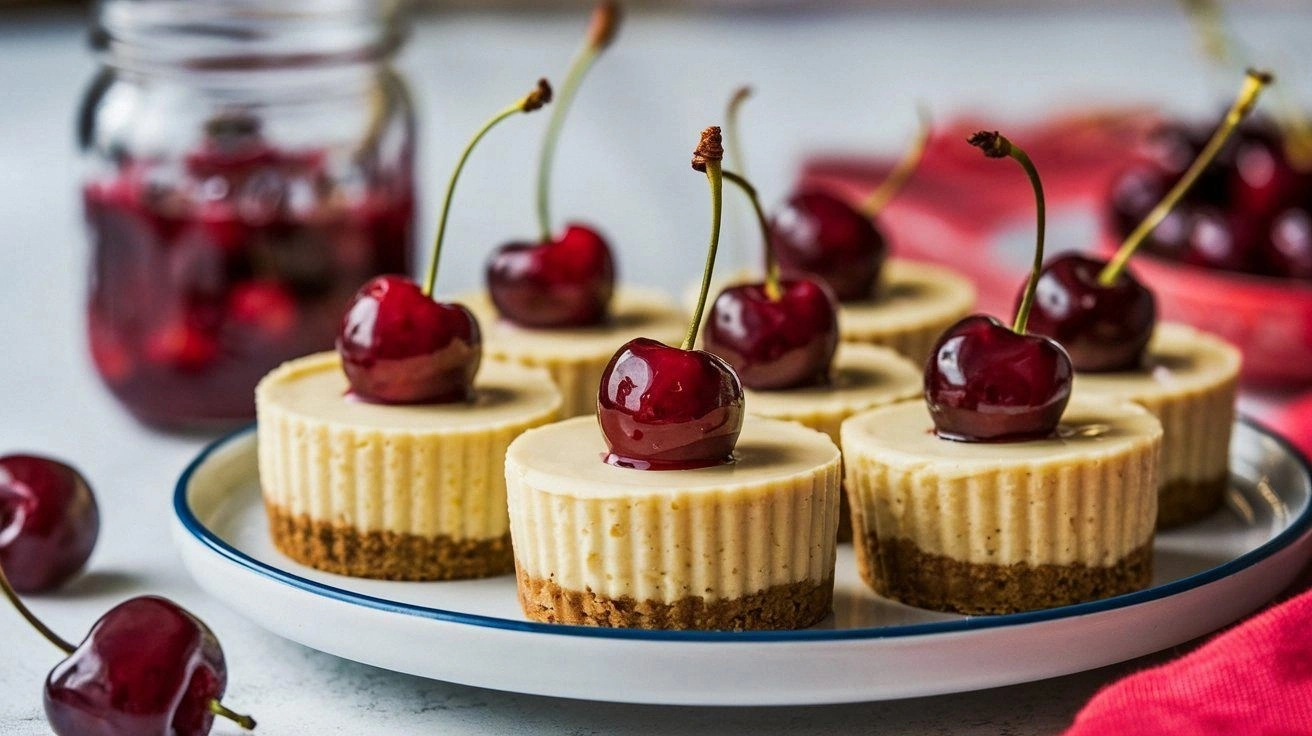
Picture this: a shallow dish filled with a golden, buttery crust of crushed vanilla wafers, the scent of toasted sugar wafting through the air as the butter melts into the crumbs. The filling, a silky blend of cream cheese, powdered sugar, and a splash of lemon, swirls together like a calm sea. When you press the spoon into the surface, you hear a satisfying crunch that gives way to a soft, velvety bite. The first taste is a gentle tang from the lemon, balanced by the rich sweetness of the cream cheese, and the vanilla undertone lingers like a whisper. Your tongue feels the slight chill from the cold ingredients, and your eyes are treated to a glossy, almost translucent finish. The entire experience feels like a gentle hug—sweet, comforting, and utterly indulgent.
What sets this version apart from the countless others you’ll find online is the meticulous attention to texture and flavor harmony. The vanilla wafer crust is toasted just enough to hold its shape, yet still offers a subtle crunch that contrasts beautifully with the creamy center. I’ve added a splash of lemon juice, which brightens the filling without overpowering it, creating a balanced sweetness that’s both refreshing and decadent. The use of heavy cream gives the cheesecake a luscious mouthfeel that’s lighter than traditional baked versions, making it easier to eat in a single bite. And because it’s no-bake, you can assemble the entire batch in under 30 minutes, freeing you from the oven to enjoy other dishes or entertain guests. I dare you to taste this and not go back for seconds; the moment you bite into the first mini, you’ll be hooked.
The secret sauce, or rather the secret ingredient, is a touch of vanilla extract that I let steep in the batter for ten minutes before chilling. This simple step unlocks a depth of flavor that would otherwise be missing. I also use a small amount of lemon zest in addition to the juice, which adds a bright, citrusy aroma that elevates the entire dish. The result? A cheesecake that feels like a luxury dessert, yet is as approachable as a cookie. The crust’s buttery richness is perfectly balanced by the airy filling, and the finish is dusted with powdered sugar that melts into the creamy center. Every bite is a revelation, a perfect marriage of crunchy and smooth that will have your friends asking for the recipe.
And here’s the kicker: this recipe can be made ahead and stored in the fridge for up to three days, making it an ideal dessert for parties or a last-minute treat. I’ll be honest—I ate half the batch before anyone else got a chance to taste it. The best part? You can customize the flavor profile by swapping vanilla wafers for chocolate cookies or adding a swirl of raspberry jam on top. The next time you’re craving something sweet but don’t want to heat the oven, reach for this recipe. Let me walk you through every single step—by the end, you’ll wonder how you ever made it any other way.
The real magic happens when you combine the simple ingredients with a few clever tricks that elevate the entire experience. By the time you read through this article, you’ll have a complete toolkit to create a dessert that’s not only delicious but also visually stunning. The process is straightforward, but the result is a showstopper that will leave your guests in awe. Ready to transform your kitchen into a mini dessert studio? Let’s dive in.
What Makes This Version Stand Out
- Taste: The delicate balance of sweet and citrus creates a flavor profile that feels both comforting and refreshing. The vanilla wafer crust adds a subtle caramel note that pairs beautifully with the creamy filling. It’s the kind of taste that makes you want to savor every bite.
- Texture: A perfectly crisp crust gives way to a silky, melt‑in‑your‑mouth center. The contrast is immediate, turning each bite into an experience rather than just a dessert. The result is a textural dance that delights the palate.
- Simplicity: No oven, no complex equipment—just a few pantry staples and a blender. The recipe is designed for anyone, whether you’re a novice or a seasoned chef. The minimal steps mean you can focus on the flavors, not the process.
- Uniqueness: The addition of lemon zest and a brief steeping period unlocks a depth of flavor rarely found in other mini cheesecakes. It’s a twist that sets this recipe apart from the generic versions you’ll find online.
- Crowd Reaction: These mini cheesecakes are a hit at parties because they’re bite‑size, elegant, and require no reheating. Guests can enjoy them immediately, and the presentation is instant wow factor.
- Ingredient Quality: Using high‑quality cream cheese and fresh vanilla wafers elevates the entire dish. The recipe is a celebration of ingredients, not a shortcut.
- Cooking Method: The no‑bake approach saves time and energy, making it perfect for busy evenings or last‑minute dessert plans.
- Make‑Ahead Potential: The cheesecakes keep well in the fridge for up to three days, allowing you to prepare them ahead of time and serve them fresh.
Alright, let’s break down exactly what goes into this masterpiece...
Inside the Ingredient List
The Flavor Base
Vanilla wafer crumbs form the foundation of this dessert, offering a buttery, slightly sweet base that cradles the creamy filling. These crumbs are the perfect canvas for the rest of the flavors, absorbing the butter and sugar to create a cohesive taste. If you skip the vanilla wafers, you lose the signature crunch and caramel undertone that makes the dessert memorable.
Melted butter is the glue that binds the crumbs together, turning them into a cohesive crust that holds its shape. The butter also adds a subtle richness that balances the tangy cream cheese. If you omit the butter, the crust will be dry and crumbly, lacking the buttery sheen that makes it visually appealing.
Powdered sugar is the sweetener that keeps the filling light and airy. It dissolves quickly, preventing a grainy texture that can ruin the silky mouthfeel. Skipping the powdered sugar will result in a denser, less smooth cheesecake that feels heavy on the palate.
The Texture Crew
Cream cheese is the star ingredient, providing the creamy, tangy base that defines a cheesecake. Its silky texture is essential for a melt‑in‑your‑mouth experience, and the quality of the cream cheese directly affects the final outcome. Using a lower‑fat or non‑fat version will compromise the richness and alter the texture, making it less indulgent.
Granulated sugar is a secondary sweetener that adds a subtle crunch when it dissolves, giving the filling a gentle bite. It also helps stabilize the mixture, ensuring it sets properly in the fridge. Removing the granulated sugar will reduce the overall sweetness and may cause the filling to be slightly watery.
Vanilla extract is the aromatic enhancer that brings depth to the cheesecake. A dash of vanilla creates a warm, comforting scent that complements the lemon and cream cheese. If you skip the vanilla, the dessert will lack that subtle complexity that elevates it from ordinary to extraordinary.
The Unexpected Star
Lemon juice adds a bright, citrusy lift that cuts through the richness of the cream cheese. The acidity balances the sweetness, creating a harmonious flavor profile that feels fresh. If you omit the lemon, the cheesecake will taste overly sweet and heavy.
Heavy cream is the final touch that makes the filling luxuriously smooth. It adds body and a silky finish that keeps the cheesecake from feeling too dense. Skipping the heavy cream will result in a firmer, less luscious texture that can be less enjoyable.
The Final Flourish
Optional fresh berries or chocolate chips add a burst of color and an extra layer of flavor that can transform the dessert into a themed treat. Berries bring a natural tartness that pairs well with the sweet filling, while chocolate chips introduce a rich, bittersweet contrast. If you prefer a plain version, you can simply omit these toppings without affecting the core recipe.
Everything's prepped? Good. Let's get into the real action...
The Method — Step by Step
- First, toast the vanilla wafers in a dry skillet over medium heat until they’re golden brown. Keep a close eye on them—they can burn quickly. The toasted wafers should emit a warm, caramelized scent that signals they’re ready. Once toasted, transfer them to a food processor and pulse until finely ground. This creates the perfect crumbly texture for the crust.
- In a small bowl, melt the butter until it’s a silky liquid. You can do this in the microwave for 15-20 seconds or in a double boiler for a gentler melt. Pour the melted butter over the ground wafers and stir until the crumbs are evenly coated. The butter should coat each crumb, forming a cohesive mixture that clumps together when pressed.
- Press the crust mixture into the bottom of your mini muffin tin, using a spoon or the back of a flat glass to compact it firmly. The crust should be packed tightly and level so the cheesecake fills the cup evenly. Let the crust set while you prepare the filling, or chill it briefly to firm up.
- In a blender, combine the cream cheese, powdered sugar, granulated sugar, vanilla extract, lemon juice, and heavy cream. Blend on high speed until the mixture is completely smooth and glossy—no lumps should remain. The blender does the heavy lifting, ensuring a silky texture that’s critical for the final product.
- Pour the creamy mixture over the crust in each muffin cup, filling them about three‑quarters full. Use a spatula to smooth the tops for an even surface. The filling should be thick enough to hold its shape but still pourable; if it’s too thick, add a splash of milk.
- This is the moment of truth—let the cheesecakes chill in the refrigerator for at least 30 minutes, or until the filling has set firmly. During this time, the flavors meld together, creating a cohesive taste that’s both sweet and tangy. Keep the tin covered to prevent the tops from drying out.
- After chilling, dust each cheesecake with powdered sugar using a fine sieve. This adds a subtle sweetness and a delicate crunch that contrasts with the creamy interior. The powdered sugar should be lightly sprinkled, not piled on, to keep the presentation elegant.
- If desired, top each cheesecake with a small spoonful of fresh berries or a drizzle of melted chocolate. These accents add color and an extra flavor dimension that will impress your guests. Let the toppings set for a minute before serving.
- Serve immediately, or keep the cheesecakes refrigerated until ready to serve. If you’re planning a large gathering, you can prepare them a day ahead and store them in an airtight container. The cheesecakes will remain fresh and delicious for up to three days.
That's it — you did it. But hold on, I've got a few more tricks that'll take this to another level...
Insider Tricks for Flawless Results
The Temperature Rule Nobody Follows
Keeping your ingredients at room temperature before blending is key. Cold cream cheese can clump and create a lumpy filling. I always let the cream cheese sit on the counter for at least 30 minutes. If you’re short on time, give it a quick 5‑minute microwave burst, but be careful not to melt it.
Why Your Nose Knows Best
Smell the batter as you blend; it should have a warm, buttery aroma with a hint of vanilla. If it’s too flat, add a splash more vanilla or a pinch of lemon zest. A strong scent signals that the flavors are well balanced, while a weak aroma often means you’re missing a key ingredient.
The 5‑Minute Rest That Changes Everything
After pouring the filling into the crust, let the cups rest on the counter for 5 minutes before refrigerating. This brief pause allows the butter to settle and the crumbs to firm up slightly, preventing the filling from sinking. A quick rest also lets the batter reach a consistent temperature, which helps it set evenly.
The Perfect Crumb-to-Cream Ratio
For a balanced bite, aim for a 1:1 ratio of crust crumbs to cream cheese by volume. If you’re using a lighter crust, add a little more cream cheese. Conversely, a denser crust may benefit from a slight reduction in cream cheese to keep the overall texture airy.
The Secret to a Fluffy Finish
Add a tablespoon of cornstarch to the filling before blending. It stabilizes the mixture and gives the cheesecake a light, airy finish. I’ve used this trick in a previous batch, and the texture was noticeably smoother. Just whisk it in gently before adding the liquid ingredients.
Creative Twists and Variations
This recipe is a playground. Here are some of my favorite ways to switch things up:
Chocolate Chip Surprise
Swirl in a handful of dark chocolate chips before chilling. The chocolate adds a bittersweet depth that pairs beautifully with the creamy filling. It’s perfect for chocolate lovers who want a richer dessert.
Berry Burst Edition
Top each cheesecake with fresh raspberries or blueberries before serving. The bright fruit adds a pop of color and a tangy contrast to the sweet filling. It’s a seasonal touch that feels fresh and vibrant.
Citrus Zest Twist
Add a tablespoon of orange zest to the batter for a citrusy kick. The zest brings a bright, fragrant aroma that complements the vanilla and lemon. It’s an easy way to elevate the flavor profile.
Almond Crunch Variation
Replace vanilla wafers with almond biscotti crumbs for a nutty crunch. The almond flavor adds depth and pairs wonderfully with the creamy center. It’s an elegant twist that feels sophisticated.
Caramel Swirl Delight
Drizzle caramel sauce into the filling before chilling. The caramel adds a silky sweetness and a glossy finish that makes the cheesecake visually stunning. It’s a crowd‑pleaser at any gathering.
Minty Fresh Finish
Stir in a teaspoon of mint extract for a cool, refreshing note. The mint balances the richness and adds a subtle herbal aroma. It’s a great choice for summer parties.
Storing and Bringing It Back to Life
Fridge Storage
Store the mini cheesecakes in an airtight container in the refrigerator for up to three days. Keep them covered to prevent the tops from drying out. When you’re ready to serve, let them sit at room temperature for about 10 minutes to soften slightly.
Freezer Friendly
Wrap each cheesecake individually in plastic wrap and place them in a freezer bag. They’ll keep for up to one month without compromising flavor. Thaw overnight in the fridge before serving for best results.
Best Reheating Method
To revive a frozen cheesecake, let it thaw slowly in the fridge. Add a tiny splash of water to the top before reheating in the microwave on low for 10-15 seconds. This steams the cheesecake back to a silky, creamy texture without drying it out.