I'll be honest — I ate half the batch before anyone else got to try it. There I was, standing in my kitchen at 6:47 AM on a Tuesday, wearing mismatched socks and a hoodie with a mysterious maple syrup stain, clutching my fourth pumpkin cinnamon roll muffin like it was the last lifeboat on the Titanic. The autumn rain was drumming against my window, my coffee had gone cold three times over, and these magnificent little swirls of fall perfection were disappearing faster than my willpower at a sample sale. This wasn't supposed to happen. I had developed this recipe for my annual Friendsgiving brunch, intending to make exactly twelve muffins to share with my book club. Instead, I found myself hiding in the pantry like a squirrel hoarding acorns, crumbs cascading down my shirt, already plotting how to explain the mysteriously empty muffin tin to my husband.
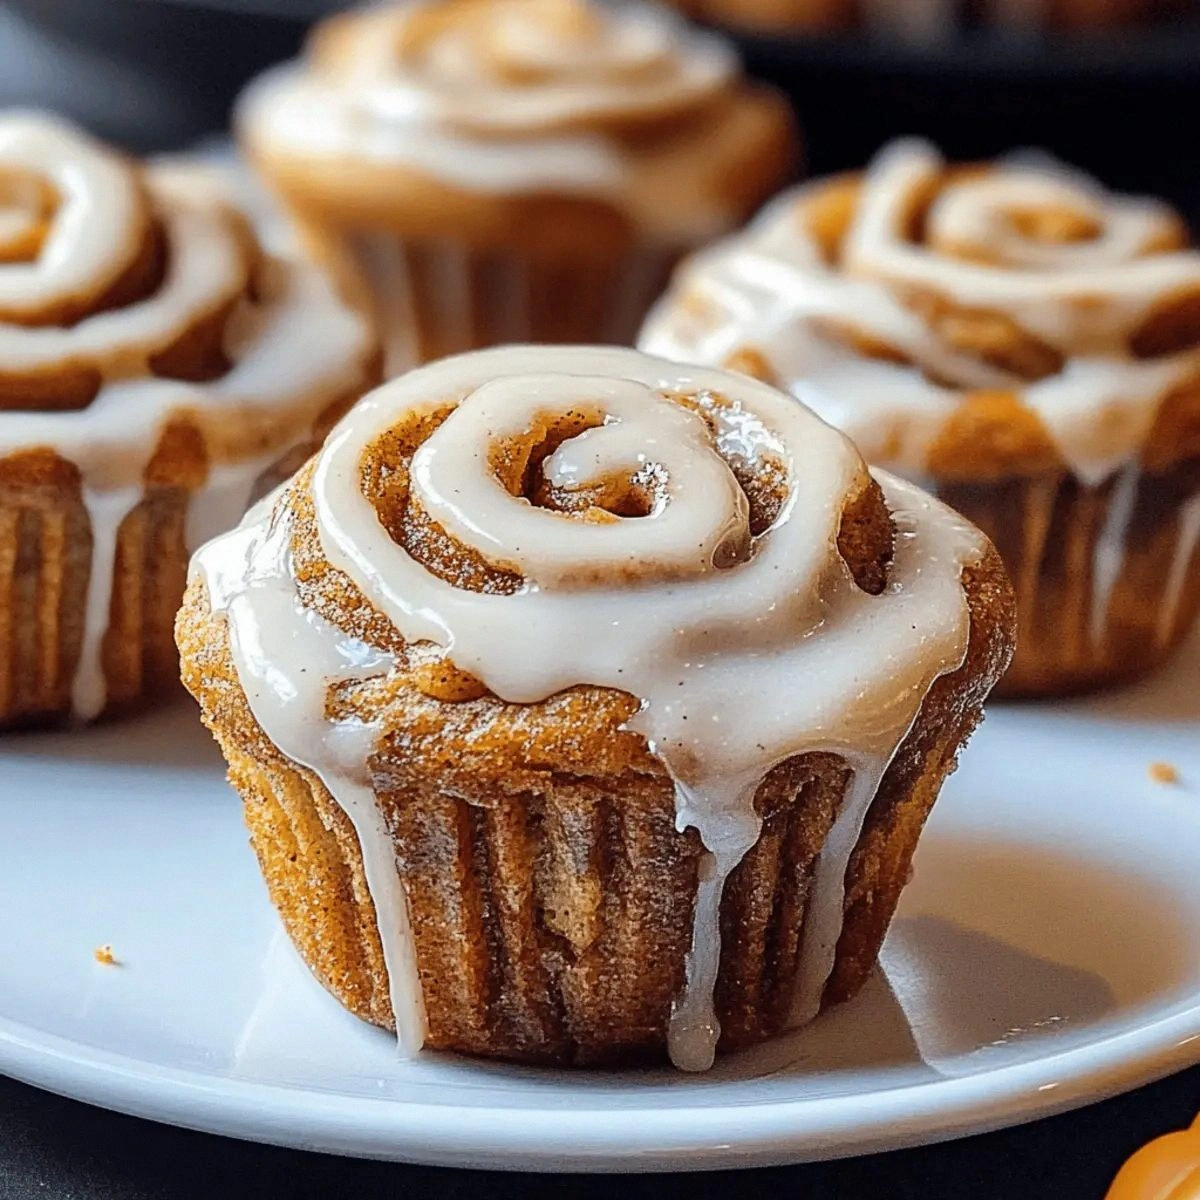
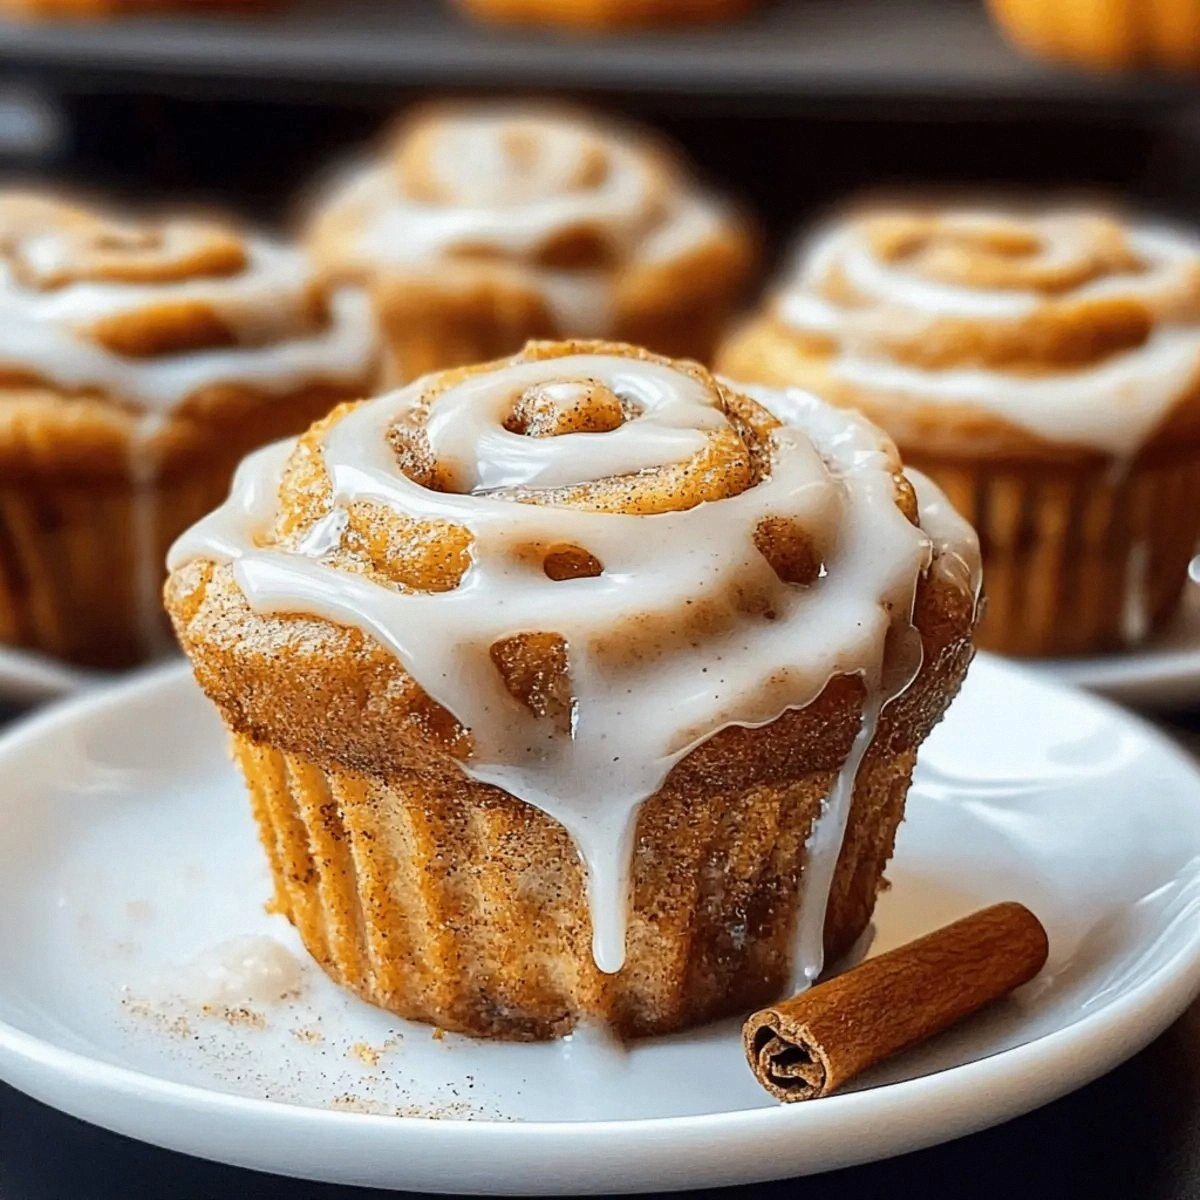
Picture yourself pulling this out of the oven, the whole kitchen smelling like someone bottled autumn and turned it into a candle. The scent hits you first — that intoxicating blend of warm cinnamon, earthy pumpkin, and buttery dough that makes your neighbors knock on your door asking if you're opening a bakery. These aren't your sad, dense coffee shop muffins that sit like paperweights in your stomach. No, these are cloud-soft pillows of spiced pumpkin batter with dramatic cinnamon-sugar ribbons running through them like edible marble. The tops crackle with caramelized sugar crystals while the insides stay impossibly tender, creating that perfect textural contrast that makes you close your eyes involuntarily with each bite.
I've made probably seventeen different versions of pumpkin muffins over the years, and most of them were disappointments masquerading as breakfast. Too dry, too bland, too pumpkiny, not pumpkiny enough — the usual suspects. But these? These are the result of a three-week obsession that involved multiple grocery store runs, one minor kitchen fire (don't ask), and a very patient family who ate their way through every experimental batch. The secret isn't just one thing — it's a combination of techniques that most recipes completely ignore, starting with the temperature of your ingredients and ending with a glaze that'll make you want to lick the spoon, the bowl, and possibly the counter.
Okay, ready for the game-changer? We're not just dumping everything in a bowl and hoping for the best. We're creating layers of flavor and texture that'll make you wonder why you've been settling for mediocre muffins your entire life. The pumpkin puree gets bloomed with warm spices before mixing, the cinnamon swirl gets a special treatment that prevents it from sinking to the bottom, and the glaze — oh, that glaze — gets whipped to silky perfection that sets into a crackly crown. Let me walk you through every single step — by the end, you'll wonder how you ever made it any other way.
What Makes This Version Stand Out
Cloud-Soft Texture: These muffins achieve that impossible balance between substantial and feather-light through a combination of room-temperature ingredients and a folding technique that keeps the gluten from getting tough. The result is a crumb so tender it practically melts on your tongue, yet sturdy enough to hold that dramatic cinnamon swirl without collapsing into a sad, deflated mess.
Intensified Pumpkin Flavor: Instead of just dumping canned pumpkin into the batter like most recipes, we're going to bloom the puree with warm butter and spices first, concentrating the flavor and removing that raw, vegetal edge that makes so many pumpkin baked goods taste like a Thanksgiving candle rather than actual food.
Cinnamon Swirl That Actually Works: Most cinnamon swirl muffins fail because the filling either sinks to the bottom or creates a dry, sugary layer. Our method creates a ribbon that stays suspended throughout the muffin, creating those gorgeous Instagram-worthy spirals that taste as good as they look.
One-Bowl Wonder: Despite tasting like they came from a fancy bakery, these come together in one bowl and one muffin tin — no special equipment required. If you've ever struggled with recipes that dirty every dish in your kitchen, you're not alone — and I've got the fix.
Make-Ahead Champion: These muffins actually improve overnight as the flavors meld, making them perfect for holiday mornings when you want to impress without the 5 AM wake-up call. The glaze sets into a crackly shell that keeps them fresh for days, not that they'll last that long.
Fall Comfort Without the Food Coma: Unlike heavy cinnamon rolls that leave you needing a nap, these hit that comfort food spot while staying light enough for breakfast. They're substantial enough to satisfy but won't weigh you down like you've eaten a pumpkin-spice brick.
Guaranteed Crowd Pleaser: I've tested these on pumpkin spice skeptics, cinnamon roll purists, and people who claim they "don't like sweet breakfast" — they all went back for seconds. This next part? Pure magic.
Inside the Ingredient List
The Flavor Base
The canned pumpkin puree is obviously the star here, but not all pumpkin is created equal. You want the plain puree, not the pie filling that's loaded with sugar and spices — trust me, we're building our own flavor profile that's way more sophisticated than the one-note sweetness from the can. Look for brands that list pumpkin as the only ingredient, and give it a good stir before measuring since it tends to separate in the can. If you open it and it smells like a pumpkin patch after rain, you've got the good stuff. If it smells like nothing or has a metallic edge, it's been sitting around too long and your muffins will taste like disappointment.
The melted butter might seem like a simple ingredient, but it's doing double duty here — adding richness while helping distribute the fat evenly throughout the batter for that tender crumb we're after. Use unsalted butter so you can control the salt level, and let it cool slightly after melting so it doesn't scramble your egg when you mix everything together. The temperature sweet spot is warm enough to still be liquid but cool enough that you can stick your finger in without yelping.
The Texture Crew
All-purpose flour provides the structure, but we're using a specific ratio that keeps these muffins tender rather than bread-like. Too much flour and you'll get dense hockey pucks; too little and they'll collapse into sad, sunken messes. The trick is spooning the flour into your measuring cup rather than scooping — scooping compacts it and can add up to 25% more flour than intended. That sizzle when it hits the pan? Absolute perfection.
Baking powder and baking soda work together here like a chemical tag team — the baking powder gives us lift over time while the baking soda reacts immediately with the acidic pumpkin for that initial rise. Most recipes get this completely wrong, using one or the other and ending up with either flat muffins or ones that taste like soap. We need both for the perfect dome and neutral flavor.
The Unexpected Star
Vanilla extract might seem basic, but it's the bridge that connects all the warm spices and makes them taste intentional rather than like someone knocked over the spice rack. Use real vanilla, not the imitation stuff — in a recipe with relatively few ingredients, you can taste the difference. The vanilla enhances the natural sweetness of the pumpkin while rounding out any harsh edges from the spices, creating that "I can't put my finger on it but these are incredible" flavor that keeps people guessing.
The Final Flourish
The brown sugar in our cinnamon swirl isn't just for sweetness — it contains molasses which adds depth and helps create that slightly chewy texture in the ribbon. Dark brown sugar has more molasses than light, giving a more complex flavor that plays beautifully against the pumpkin. If you only have light brown sugar, you can fake it by adding a teaspoon of molasses or even dark corn syrup to deepen the flavor profile.
The Method — Step by Step
- Start by preheating your oven to 425°F — yes, that's hotter than most muffin recipes, but we're creating that initial burst of steam that gives us those sky-high domes. Line your muffin tin with paper liners or grease them well with butter, making sure to get into every nook so your muffins release like silk. In a small saucepan, gently warm your pumpkin puree with the melted butter over low heat, stirring constantly until it's just warm to the touch and smells like autumn in liquid form. This blooming step concentrates the pumpkin flavor and removes any tinny taste from the can, transforming it from a sad orange blob into something that'll make your kitchen smell like you've been simmering pie filling for hours.
- In a large bowl, whisk together the flour, baking powder, baking soda, salt, and cinnamon until they're evenly distributed — this ensures you won't bite into a pocket of bitter baking soda or a desert of flour later. Create a well in the center like you're making pasta, then add the warm pumpkin mixture, sugar, egg, and vanilla. Using a rubber spatula, fold everything together with slow, deliberate strokes, scraping the bottom and sides of the bowl. The batter should come together quickly but still have some small lumps — resist the urge to overmix or you'll develop the gluten and end up with tough, bouncy muffins that could double as tennis balls.
- Now for the cinnamon swirl that'll make these legendary. In a small bowl, combine the brown sugar, cinnamon, and melted butter until it forms a thick, glossy paste that smells like Christmas morning. This isn't just sugar and spice — the butter helps the swirl stay pliable so you can marble it through the batter without it dissolving or sinking. Drop small dollops of this mixture onto the batter, then use a skewer or the tip of a knife to create dramatic swirls. Don't overdo it — you want distinct ribbons, not brown soup. The contrast between the orange batter and the dark cinnamon streaks should look like a sunset captured in muffin form.
- Fill each muffin cup to the very top — we're talking domed and proud, not timid and flat. This is where most recipes go wrong, telling you to fill them 2/3 full like you're making cupcakes. Muffins need that extra batter to create the characteristic mushroom top that spills over the edges in the most enticing way. If you run low on batter, steal from the other cups rather than making a few sad, flat muffins. They should look like they're wearing little orange beanies of promise.
- Slide the tin into your screaming hot oven and set a timer for 5 minutes — this initial blast is crucial for setting the outside while keeping the inside tender. Without opening the door, reduce the temperature to 375°F and bake for another 15-18 minutes. The muffins are done when they're golden brown, spring back when lightly touched, and a toothpick inserted into the center comes out with just a few moist crumbs. The tops should be cracked and caramelized, the cinnamon swirl peeking through like edible art.
- While they're baking, prepare the glaze that'll take these from great to life-changing. In a small bowl, whisk together the powdered sugar, vanilla, and milk until it's smooth and pourable but not too thin — think heavy cream consistency. The glaze should ribbon off your spoon and hold its shape for a moment before settling into a glossy pool. If it's too thick, add milk a teaspoon at a time; too thin, add more sugar. This glaze sets into a crackly shell that'll make that satisfying snap when you bite into it.
- Let the muffins cool in the pan for exactly 5 minutes — no more, no less. This is the critical window where they're set enough to remove but still warm enough for the glaze to melt slightly and adhere perfectly. Loosen the edges with a butter knife if needed, then transfer them to a wire rack. Place a sheet of parchment paper underneath to catch the inevitable glaze drips that you'll definitely want to scrape up later with your finger.
- Drizzle the glaze over the warm muffins in a dramatic zigzag pattern, letting it cascade down the sides in sticky rivulets. The heat will cause it to melt slightly and pool in the cracks, creating those bakery-style glossy tops that look professionally done. Don't be stingy — this glaze is the difference between good muffins and the ones people will ask you to make every fall for the rest of your life. Let them set for about 10 minutes before serving, if you can wait that long.
- And now the fun part — serving them up while they're still slightly warm, the glaze crackling under your fork, steam rising in little wisps that carry the scent of cinnamon and pumpkin through your entire house. Break one open and watch how the inside stays tender and moist while the top provides that satisfying crunch. The cinnamon swirl creates pockets of concentrated flavor that burst in your mouth like little spice bombs, balanced perfectly by the sweet glaze that ties everything together.
Insider Tricks for Flawless Results
The Temperature Rule Nobody Follows
Room temperature isn't just for fancy baking competitions — it's the difference between muffins that rise like champions and ones that spread like pancakes. Pull your egg out 30 minutes before baking, and if you're impatient (like me), place it in a bowl of warm water for 5 minutes. Cold egg meeting warm pumpkin mixture will seize up the batter faster than you can say "lumpy disaster," creating little pockets of cooked egg that'll ruin the texture. The same goes for your milk if you use any — everything should be friends before they meet in the bowl, not strangers forced to work together.
Why Your Nose Knows Best
Trust your sense of smell more than the timer — when these muffins are done, your kitchen will smell like a fall festival exploded in the best possible way. The scent changes from raw and floury to warm and inviting right when they're perfectly baked. A friend tried skipping this step once and pulled them out too early, ending up with gummy centers that tasted like pumpkin-flavored paste. Don't be that friend. Your nose is smarter than you think, and it's been trained by years of knowing when cookies are done.
The 5-Minute Rest That Changes Everything
After baking, let the muffins rest in the pan for exactly 5 minutes — this isn't arbitrary timing, it's science. Too short and they'll fall apart when you remove them, too long and they'll steam themselves soggy from the bottom up. Set a timer and don't get distracted by Instagram or you'll end up with sad, wet-bottomed muffins that no amount of glaze can save. This is the moment of truth where patience pays off in perfectly set muffins that release cleanly from the pan.
The Glaze Consistency Secret
The perfect glaze should coat your spoon like liquid velvet, falling in ribbons that hold their shape for just a moment before disappearing into the bowl. Too thin and it'll run right off the muffins, pooling in sticky puddles around the base. Too thick and it'll sit there like frosting, refusing to cascade down the sides in that gorgeous bakery-style drip. Test it by lifting your whisk — it should ribbon off in a steady stream that you can almost count, like slow-motion caramel. If you've ever struggled with glaze that either disappears or looks like toothpaste, you're not alone — and I've got the fix.
The Storage Game-Changer
Here's what actually works: store these in a container with a slightly loose lid rather than sealed tight. Trapping all the moisture makes the glaze weep and the tops get sticky, but too much air exposure dries them out. It's like Goldilocks and the three bears — you want just enough air circulation to keep them fresh without turning them into hockey pucks. Line the container with paper towels to absorb excess moisture, and they'll stay perfect for up to four days (though let's be real, they'll be gone in two).
Creative Twists and Variations
This recipe is a playground. Here are some of my favorite ways to switch things up:
Maple Pecan Dream
Replace half the granulated sugar with pure maple syrup and fold in 1/2 cup of toasted chopped pecans. The maple adds a deeper, more sophisticated sweetness that pairs beautifully with the pumpkin, while the nuts provide a delightful crunch that contrasts with the tender crumb. Reduce the milk in the glaze to 1 tablespoon and replace it with maple syrup for a double maple whammy that'll make your house smell like a Vermont sugar shack.
Salted Caramel Swirl
Ditch the cinnamon swirl and instead make a quick caramel with 1/4 cup sugar, 2 tablespoons cream, and a generous pinch of sea salt. Let it cool slightly until thick but pourable, then marble it through the batter for a sophisticated sweet-salty combination that'll make grown adults weep with joy. The caramel creates little pockets of gooey luxury that elevate these from breakfast to dessert status.
Cream Cheese Filled Centers
Beat 4 ounces of cream cheese with 2 tablespoons sugar and 1/2 teaspoon vanilla until smooth. Fill each muffin cup halfway with batter, add a tablespoon of the cream cheese mixture, then top with more batter and swirl as directed. The result is a molten cream cheese center that stays creamy even after baking, creating little surprise pockets of tangy richness that balance the sweet muffin perfectly.
Chocolate Chip Comfort
Add 3/4 cup of mini chocolate chips to the batter and replace the cinnamon in the swirl with cocoa powder. The chocolate chips stay suspended throughout, creating little bursts of melty chocolate in every bite, while the cocoa swirl adds depth without overwhelming the pumpkin. Use dark chocolate chips for a more sophisticated flavor that won't make these cloyingly sweet.
Orange Cranberry Brightness
Add the zest of one orange to the batter and fold in 1/2 cup of dried cranberries that you've soaked in hot water for 10 minutes. The orange brightens the pumpkin flavor while the cranberries add little jewels of tartness that cut through the richness. Replace the milk in the glaze with orange juice for a citrusy finish that makes these perfect for holiday mornings.
Coconut Cardamom Exotic
Replace 1/4 cup of the flour with unsweetened shredded coconut and add 1/2 teaspoon of ground cardamom to the batter. The cardamom adds an exotic floral note that transforms the familiar into something mysterious and wonderful, while the coconut provides subtle texture and tropical undertones. Toast the coconut first for even more depth of flavor.
Storing and Bringing It Back to Life
Fridge Storage
These keep beautifully in the refrigerator for up to 5 days — the cold actually helps set the glaze into that perfect crackly shell. Store them in an airtight container with paper towels between layers to prevent them from sticking together. The flavors actually meld and improve after the first day, making them ideal for make-ahead breakfast prep. Let them come to room temperature for 20 minutes before serving, or pop them in the microwave for 8-10 seconds to take the chill off without making the glaze weep.
Freezer Friendly
These freeze like champions for up to 2 months — glaze and all. Wrap each muffin individually in plastic wrap, then place them in a freezer bag with as much air removed as possible. To thaw, leave them at room temperature for about an hour, or microwave from frozen for 20-25 seconds. The glaze might look slightly dull after freezing, but a quick blast under a broiler for 30 seconds will restore its shine. Pro tip: freeze them on a baking sheet first, then wrap — this prevents the glaze from getting squished.
Best Reheating Method
The oven is your friend here — 300°F for 8-10 minutes brings them back to just-baked glory without drying them out. Add a tiny splash of water to the baking sheet before reheating; it creates steam that rehydrates the muffins from the outside in. The microwave works in a pinch, but wrap them in a damp paper towel first to prevent the glaze from turning into a sticky mess. If you're reheating just one, split it in half and toast it cut-side down in a dry skillet for 2-3 minutes — it creates crispy edges that shatter like thin ice while keeping the inside tender.