I was standing in my kitchen, staring at a wilted spaghetti squash that had been abandoned on the counter for weeks. I could hear the faint hiss of the microwave as I tried to salvage it, but the squash was so dry it felt like a desert in a bowl. That moment was the catalyst for what would become the most triumphant, cheese‑laden, spaghetti‑squash masterpiece I’ve ever whipped up. I laughed at myself, realizing that I was about to turn a kitchen disaster into a culinary triumph.
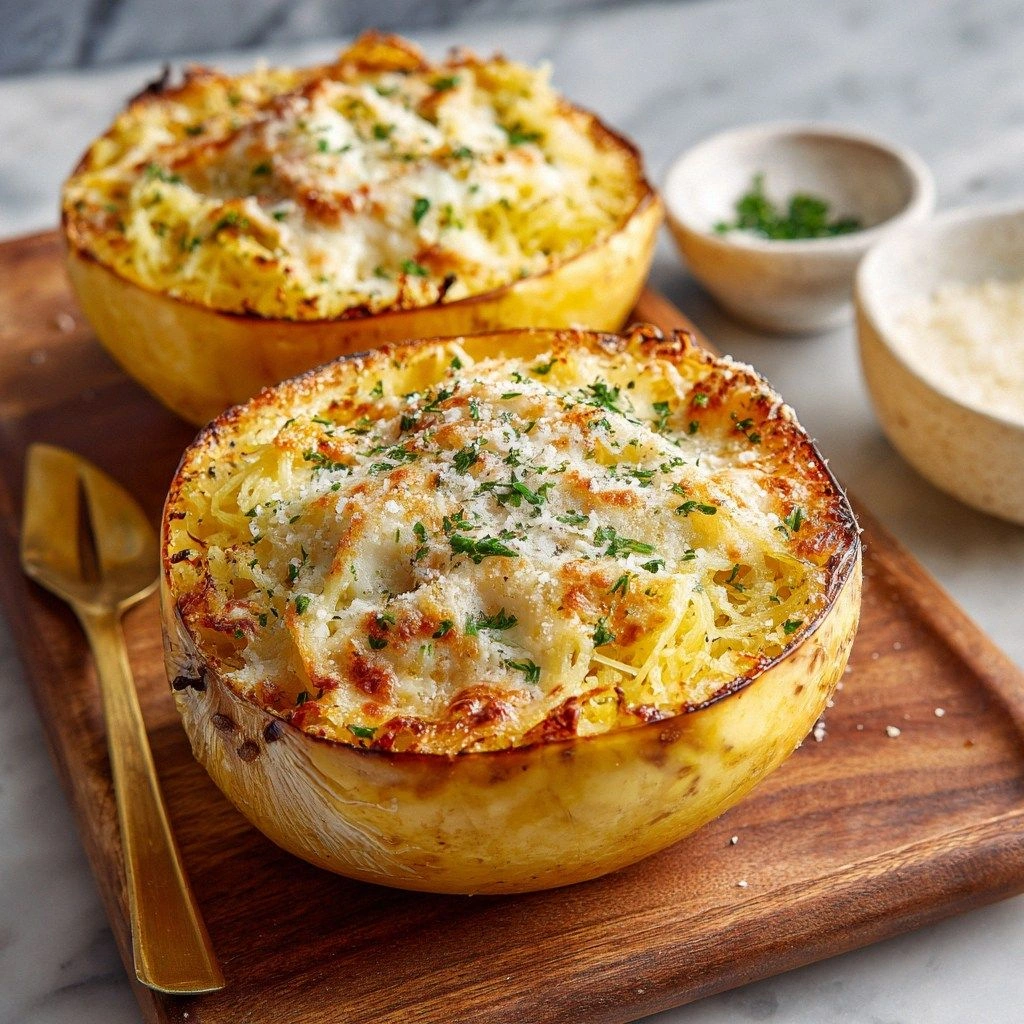
Picture this: the squash, roasted until the flesh is caramelized, then shredded into silky strands that look like pasta. The aroma that fills the air is a blend of sweet squash, toasted garlic, and bubbling melted cheese. The sound of the skillet sizzles as the cheese melts into a glossy, velvety sauce, and the first bite is a comforting, gooey explosion that feels like a warm hug from the inside. I swear, the moment you taste it, you’ll be tempted to sneak a second spoonful before you even realize you’re eating a whole bowl.
What sets this version apart is not just the three cheeses—though that alone is a game‑changer—but the way every element is coaxed into harmony. I’ve balanced the natural sweetness of the squash with a slight tang from the parmesan, softened the sharpness of the cheddar with a splash of cream cheese, and added a whisper of garlic that lingers without overpowering. The result is a dish that feels both indulgent and comforting, yet surprisingly light. And the best part? You’ll never have to reach for a pre‑made pasta sauce again.
There’s a secret technique I’ll reveal that will elevate the flavor profile: roasting the squash until the edges are crisp enough to crack like thin ice, then tossing them with a drizzle of olive oil and a pinch of sea salt before the cheese is added. The crisp edges give a satisfying contrast to the soft strands, while the oil adds depth that makes the cheese coat the strands like velvet. I dare you to taste this and not go back for seconds, because once you’ve experienced this, you’ll never settle for anything less.
What Makes This Version Stand Out
- Flavor: The trio of cheeses—mozzarella, cheddar, and parmesan—creates a layered taste that starts sweet, dips into sharpness, and ends with a nutty finish. Each cheese contributes its unique profile, resulting in a symphony that’s richer than any single‑cheese dish.
- Texture: The roasted squash strands are silky yet slightly firm, providing a pleasing contrast to the gooey cheese sauce. The breadcrumb topping adds a crunch that’s just enough to keep the dish from feeling soggy.
- Ease: No need to boil pasta or cook a separate sauce. The squash cooks in the oven, and the cheese melts in a pan in minutes, making this a low‑effort, high‑reward meal.
- Health: Squash is low in calories but high in fiber and vitamins A and C, while the cheeses provide protein and calcium. The dish is a balanced, nutrient‑dense option that still feels indulgent.
- Versatility: It works as a hearty main course or a side dish. Toss it with grilled chicken or turkey for a protein boost, or serve it alongside a crisp salad for a lighter option.
- Make‑ahead Friendly: The dish can be assembled a day ahead and reheated in the oven or microwave. The cheese remains creamy, and the squash retains its texture.
- Party‑Ready: The colorful presentation and the cheese melt make it a crowd‑pleaser at potlucks and family gatherings. Everyone will ask for the recipe after the first bite.
- Seasonal Flexibility: While perfect for fall when squash is in season, it can be made year‑round with frozen squash or canned pumpkin puree as a substitute.
Alright, let’s break down exactly what goes into this masterpiece…
Inside the Ingredient List
The Flavor Base
The foundation of this dish starts with the spaghetti squash itself. Choose a medium squash with a slightly orange flesh for the best sweetness. When you roast it, the natural sugars caramelize, giving a subtle caramel note that pairs perfectly with the cheeses. If you skip the squash, you lose that sweet backbone and end up with a bland, cheese‑heavy dish. For a twist, try a butternut squash for a deeper flavor.
Olive oil is the second key player. A drizzle of extra‑virgin olive oil before roasting adds a fruity brightness and helps the squash crisp up. It also provides a smooth base for the cheese sauce to cling to. If you’re looking for a lighter version, swap the olive oil for a neutral oil like grapeseed or sunflower, but you’ll lose a touch of depth.
Garlic and onion are the aromatic duo that kick things off. Finely minced garlic releases a warm, slightly sweet aroma when sautéed, while onion adds a mellow sweetness that balances the sharpness of the cheddar. If you’re garlic‑sensitive, use roasted garlic cloves for a milder profile. Skipping them will make the dish feel flat.
The Texture Crew
Breadcrumbs are the unsung hero that prevents the dish from becoming a mush. They absorb excess moisture from the cheese sauce and add a subtle crunch. Toast the breadcrumbs in a skillet with a little olive oil until golden, then sprinkle them on top just before serving. If you prefer a gluten‑free option, use crushed nuts or a gluten‑free breadcrumb mix.
Butter adds a silky richness that elevates the overall mouthfeel. It helps the cheeses melt into a cohesive sauce and gives a glossy finish. A tablespoon of butter is enough; too much and the dish can feel greasy. For a dairy‑free version, replace the butter with a vegan butter or a splash of olive oil.
The Unexpected Star
Cream cheese is the secret weapon that bridges the sharpness of cheddar and the nutty parmesan. It adds a subtle tang and a creamy texture that makes the sauce coat the strands like velvet. If you’re looking for a healthier alternative, use Greek yogurt or a cashew‑based cream. However, the classic version with cream cheese is unbeatable.
The Final Flourish
Fresh parsley is the finishing touch that brightens the dish with a hint of green freshness. It also adds a subtle herbal note that cuts through the richness of the cheeses. If you don’t have parsley on hand, dill or chives can work as a substitute, though the flavor profile will shift slightly. Skipping the garnish will make the dish look less vibrant.
Everything’s prepped? Good. Let’s get into the real action…
The Method — Step by Step
- Preheat the oven to 400°F (200°C). Slice the spaghetti squash in half lengthwise and scoop out the seeds. Place the halves cut side down on a baking sheet lined with parchment paper. Roast for 30–35 minutes, until the flesh is tender and the edges start to brown. This step caramelizes the natural sugars, giving the squash a deep, sweet flavor.
- While the squash roasts, heat a tablespoon of olive oil in a large skillet over medium heat. Add the minced garlic and diced onion, sautéing until fragrant and translucent, about 3–4 minutes. The aroma should be sweet and warm, setting the stage for the cheese sauce.
- Remove the squash from the oven and let it cool enough to handle. Use a fork or your fingers to shred the flesh into spaghetti‑like strands. Return the shredded squash to the skillet with the garlic and onion, stirring to combine.
- Add the butter to the skillet and let it melt, swirling the mixture to coat the squash. This creates a silky base for the cheeses. Then pour in the milk, stirring until the mixture is smooth.
- Lower the heat to medium‑low and add the shredded mozzarella, cheddar, and parmesan in equal portions. Stir continuously until the cheeses melt into a thick, glossy sauce that clings to the squash strands. The sauce should look like a velvety coat.
- Crumble the cream cheese into the skillet, letting it melt into the sauce. This step creates a smooth, tangy undertone that balances the sharpness of the cheddar. Keep stirring until the sauce is homogeneous.
- Season with salt and pepper to taste. If you want a smoky kick, sprinkle a pinch of smoked paprika. Taste the sauce; it should be creamy, slightly tangy, and rich. This is the moment of truth—if the sauce is too thick, add a splash more milk; if too thin, let it simmer for a few more minutes.
- Transfer the cheesy squash mixture to a baking dish. Sprinkle the toasted breadcrumbs on top, then drizzle a little more olive oil over the breadcrumbs for extra crispness. Bake at 350°F (175°C) for 10 minutes, until the breadcrumbs are golden and the top is bubbling.
- Remove from the oven and let it rest for 5 minutes. This resting period allows the flavors to meld and the cheese sauce to thicken slightly. Garnish with fresh parsley before serving. The final dish should look golden, fragrant, and irresistibly creamy.
That’s it— you did it. But hold on, I’ve got a few more tricks that’ll take this to another level. Keep reading for insider tips that will make your dish even more spectacular.
Insider Tricks for Flawless Results
The Temperature Rule Nobody Follows
Many people roast the squash at a high temperature and then add the cheese sauce at the same heat, which often burns the cheese. Instead, roast the squash at 400°F (200°C) and then switch to a low, medium‑low setting for the cheese sauce. This gentle heat keeps the sauce silky and prevents the cheese from curdling. I once tried the high‑heat method and ended up with a lumpy, rubbery sauce—lesson learned!
Why Your Nose Knows Best
Before you finish cooking, give the dish a quick sniff. A faint nutty aroma from the toasted breadcrumbs signals that they’re golden and ready. If the scent is too oily or burnt, take the dish off the heat immediately. Your nose is the best judge of doneness—trust it!
The 5-Minute Rest That Changes Everything
Letting the dish rest after baking allows the cheese sauce to set and the flavors to meld. This brief pause also lets the breadcrumb topping firm up, giving a crisp bite that contrasts the creamy interior. Skipping this step makes the dish feel rushed and less cohesive.
The Secret of Extra Cheesy Texture
If you love an extra cheesy bite, sprinkle a handful of shredded mozzarella on top before the final bake. The cheese will melt into the breadcrumbs, creating a gooey, melty layer that’s impossible to resist. I’ve seen this trick turn a simple side dish into the star of the dinner table.
The Quick‑Cool Trick
After roasting, place the squash halves on a wire rack to cool for a few minutes. This prevents the moisture from steaming the squash, which can make it soggy. A quick cool also makes shredding easier, as the flesh is firm enough to handle without breaking apart.
Creative Twists and Variations
This recipe is a playground. Here are some of my favorite ways to switch things up:
Mediterranean Medley
Swap the cheddar for feta and add sun‑dried tomatoes, Kalamata olives, and a pinch of oregano. The briny olives and tangy feta give the dish a Mediterranean flair that’s perfect for summer gatherings.
Spicy Southwestern
Add diced jalapeños, a dash of chipotle powder, and a sprinkle of cumin. Finish with fresh cilantro and a squeeze of lime for a zesty kick that transports you to the Southwest.
Vegan Dream
Replace all dairy with plant‑based alternatives: use vegan mozzarella, cheddar‑style cheese, and a cashew‑based cream cheese. A splash of nutritional yeast adds a cheesy depth that’s surprisingly satisfying.
Protein Power
Add grilled chicken, sliced sausage, or sautéed shrimp to the sauce. The protein elevates the dish from a side to a full‑blown main course, making it ideal for dinner parties.
Breakfast Bonanza
Serve the cheesy squash over a bed of scrambled eggs and top with a poached egg. The combination of creamy sauce and runny yolk creates a breakfast that feels like a decadent brunch.
Holiday Holiday
Add a handful of chopped walnuts, dried cranberries, and a drizzle of maple syrup before the final bake. The sweet, nutty flavors pair beautifully with the cheese and squash, making it a festive treat for the holidays.
Storing and Bringing It Back to Life
Fridge Storage
Store the cooked dish in an airtight container in the refrigerator for up to 3 days. The cheese sauce will thicken slightly, but a splash of milk or a few tablespoons of water can re‑loosen it when reheated.
Freezer Friendly
To freeze, place the dish in a freezer‑safe container or zip‑lock bag, leaving some space for expansion. Freeze for up to 2 months. When ready to eat, thaw overnight in the refrigerator and reheat in the oven at 350°F (175°C) for 15 minutes, or microwave on medium power for 3–4 minutes.
Best Reheating Method
Reheat in a skillet over medium heat, stirring frequently, and add a splash of milk or water to restore creaminess. The key is to keep the heat low to prevent the cheese from separating. The result will be a dish that tastes almost brand‑new.